Wednesday, December 1, 2010

December '10 LINKY...add your Forges Here!

We are just going to continue on this month...everybody is very busy with the holidays, so if you have any past or current forges to link up, then please do so here.  Different homemade cheese and dairy is always welcome, as well.  We wish everybody a safe and peaceful holiday season...

If you happen to make any fun holiday cheese creations (cheese balls, logs, etc.) feel free to link to those this month, as well!
Here's a bit of inspiration for you from the American Egg Board:
picture courtesy CCF
Holiday Cheese Log
  • 3/4 cup finely chopped parsley
  • 1/4 cup chopped roasted pecans
  • 1/4 cup finely chopped red pepper
  • 3 ounces reduced-fat cream cheese, softened
  • 4 ounces blue cheese, crumbled
  • 6 hard-cooked eggs, finely chopped
  • 2 tablespoons finely chopped green onions
  • 1 garlic clove, minced
  • 1 dash red pepper sauce
 In small bowl, combine first 3 ingredients. Set aside. In medium bowl, beat cream cheese and blue cheese until blended. Stir in eggs, onions, garlic, and red pepper sauce until blended. Shape mixture into a 10-inch log. Roll in reserved parsley mixture. Cover and chill at least 2 hours. Serve with crackers.  (makes ~2c.)
---------------------------------------------------------------------------
No forgers this month :(  The holidays got the best of all of us...let's start again in the new year :)

Thursday, November 4, 2010

Our November Cheesy Challenge: Queso Fresco

With the holidays dominating most of our time for the next couple of months, we've decided to keep the cheesin' simple and go with another fresh cheese this month...and we're heading to....
...and who better to take us there than my kitchen idol, Mr. Rick Bayless himself?  Yup, his newest book Fiesta at Rick's has a fabulous recipe for Queso Fresco...one of my favorites and staple in our house at all times.  I must admit, though...I haven't made my own in quite some time.  Better get back to it...there's nothing like it!
*Bayless notes that he likes to use the buttermilk in this recipe as a starter...to let the milk culture for a few hours before moving on to the cheesing process.  The flavor reminds more of the artisanal cheeses that he knows and loves.  Good enough for me! BUT, if you don't have the time...or the buttermilk...then you may skip this step.  And I imagine sacrifice some depth.

Queso Fresco
from Fiesta at Rick's by Rick Bayless
makes ~1 lb.

1 gallon whole or 2% milk (remember, the richer the milk/flavor, the better the cheese)
2 c. buttermilk
1 tsp. Citric Acid (sometimes called sour salt, sometimes found in kosher section of grocery stores)
OR
1 c. fresh lime juice
1 tsp. salt (pure, fine-ground sea salt works best)

1. Culture the milk.  Pour milk into a very large pot over med-low heat.  Stir in buttermilk.  Bring milks to 75° F, turn off heat, cover pot and let sit for 3 to 4 hours.

2. Set the curd.  If using citric acid, stir it into ¼ c. cold water, continuing to stir until dissolved.  With lid off pot, turn heat to medium and stir dissolved citric acid or lime juice into milk mixture.  You will immediately see small curds start to form.  Every couple of minutes, stir slowly, gently, & thoroughly over entire bottom of pot until milk reaches 195°F, ~20 minutes.  At this point the curds will be very obvious, floating in the milky-transparent whey.  Remove from heat, let stand five minutes without stirring so all the curd can rise to the top.

3.  Drain the curd from the whey.  Wet a large piece of cheesecloth and line a large colander with it.  Set colander in sink (or over bowl if saving the whey).  Carefully ladle all of the curd into the colander. Gather the cheesecloth around the curd and gently squeeze to expel a bit more whey.  Unwrap curd onto a plate, break it up, and sprinkle w/ the salt...working it in with a spoon or your fingers.

4.  Gather the cheese curds into a 1" thick disk, transfer to a plate, cover, and refrigerate until thoroughly chilled.

...and can I just add...THEN GO USE IT IN A FABULOUS MEXICAN RECIPE!  Or sprinkle it on tacos, tostadas, enchiladas, gorditas...you name it!  I cannot get enough Queso Fresco!

As always, if there's a different Queso Fresco recipe you'd like to use, then please do so.  Link up your posts (or any past forges) to this months linky, which you can find through the sidebar, in the top rh corner!  

Cheese on, Forgers!

November '10 - link your FORGES here!

Hello Forgers!

This month we're forging Queso Fresco!  We also have Colby and Cheddar from the past few months ripening...possibly... 

Link any of those cheeses, or any PAST forges that you post in November 
RIGHT HERE!!


We can't wait to see what you forged this months!


This linky list is now closed.

Monday, October 18, 2010

How to Make a Mesophilic Starter Culture

Sometimes a cheese recipe will give you the option of using a starter culture, rather than a direct-set starter. Here is how you do it!

PREPARATION OF MESOPHILIC STARTER CULTURE
  • Sterilize a clean 1 litre mason jar and lid in boiling water for 5 min. Cool, then fill jar with fresh skim milk leaving a ½ inch head space. Secure lid firmly into jar.
  • Place the jar into canning pot and fill with water to the same levels as the milk in the jar.
  • Bring the pot to a rolling boil and hold for 30 mn
  • Remove jar of sterile milk carefully from the canning pot and allow to cool to 20-22 C or 72 F. To check if the milk in the jar is adequately cooled, hold the jar next to your cheek and it should feel tepid or just slightly warm. It takes about 6-8 hrs after removing from hot water bath.
  • Innoculate the sterile milk by adding 3/8 tsp of the freeze dried mesophilic starter culture to the 1 litre mason jar of sterile milk. Sprinkle the culture evenly on the surface of the milk and quickly re-secure the lid. Allow the culture to dissolve for 2 mn and gently agitate the culture into the milk until fully dispersed. To ensure the culture is adequately mixed, look at the bottom of the mason jar to see if there is any yellow granules. If so, continue to rock the jar until they have disappeared, as this represents culture powder that has not dissolved into the milk.
  • Place the jar in a warm place where the temp. is stable at 72 F or 22 C, up as high as 77 F or 25 C. Keep it there for 12-24 hrs until the milk has thickened. The most ideal location is in the cupboard over the refrigerator, the jar wrapped in a hand towel.
  • After 12 hrs from the time of innoculation, check to see if the milk has coagulated or thickened. This usually takes about 16 hrs under favorable conditions but it can be sooner if the temperature is warmer. When the culture has the consistency of a good firm yoghurt you have reach the coagulation point.
  • Chill the culture immediately by placing the jar in the fridge. It will keep as a fresh active culture for 3-4 wks. The fresher your culture the better your cheesemaking results. The culture can be used for cheesmaking right after the coagulation point is reached. 10 grams of mesophilic culture can be made into 10 litres of mother culture. Do not freeze your prepared culture!!!
  • Keep the unused portion of your culture package in the freezer where it will remain active for 3 years.
  • It is not necessary to prepare a culture in order to make cheese. The freeze dried cultures can also be used as a direct set culture at the recommended rate of the recipe. You can prepare cheese by adding the powder into your cheese pot or vat for direct inoculation.
  • The above procedure can be used to prepare mesophilic and aroma cultures only.

information from Glengarry Cheesemaking Co. 

Friday, October 1, 2010

October's Cheesy Challenge - Greek Island Mizithra

Greek Island Mizithra
adapted from 200 Easy Homemade Cheese Recipes

3 quarts whole milk
1 tbsp pickling (canning) or kosher salt
½ tsp liquid rennet

Sterilize all equipment.
In a large stainless steel pot, heat milk gently to 90°F, stirring gently to prevent scorching.
Remove from heat and stir in salt

Dilute rennet in ¼ cup cool water. Add to milk and, using an up-and-down motion, draw rennet down into milk until well blended. Cover and set aside at room temperature for 30 minutes to an hour, or until a firm curd has formed.

Using a whisk, gently break up curd, stirring until curd pieces are approximately ½ inch in size. Let stand for 2-3 minutes. Using skimmer, stir gently for 5 minutes.

Gently pour curd into a cloth-lined colander and let drain for 1 hour. Scrape cheese into center of cloth. Gather the four corners of the cloth together and tie to create a bag. Hang the bag and let drain over a bowl or the sink for another 5 hours at room temperature. Place a colander in a bowl; place bag in the colander and let drain in the refirgerator for another 12 hours. Twist the cloth tighter from time to time to aid draining.

Remove cheese from cloth and place in a bowl. Store in the refrigerator for up to 2 weeks.


There you have it! October's cheesy challenge. Here is a link to the book if you wish, you can use the recipe we provided or one of your choosing. There are many variations of Mizithra.


Link up to the October linky when you have some great cheese to share!

Want to suggest recipes for Forging Fromage? Just let us know! 
email us at forgingfromage at live dot com


How are your colby and cheddar doing? Mine are still hanging out, suffering benign neglect in my beer fridge. The colby should be ready soon!

Link up your October forges HERE!

Hey Everybody!! This is the place to link up anything you forge during the month of October! Can't wait to see what everybody comes up with!!


This linky list is now closed.

Thursday, September 2, 2010

Challenge: Ricotta Salata

Our newest Cheesy Challenge is going to be Ricotta Salata.  Ricotta Salata is a sliceable cheese with a texture similar to Romano, but it is not nearly as complex...as it doesn't get better with age.  It should be eaten within a week or so.  Basically you use the curds you get from making Ricotta (loose, fresh cheese) and press and salt them.

If you've never made a basic Ricotta, well then...this is your chance to knock out two cheesy challenges at once!  As usual, you are welcome to use any recipe or method you choose...but I'll go ahead and give you one just in case you don't have one that you already like...or are just too lazy to go looking. No shame in that...it's like I'm talking to myself. I'll start with a Ricotta recipe...gotta start with the basics...and then move on to the Ricotta Salata. Lots of people who are already into making cheese make Ricotta with the whey left after making another cheese...great! Use your chosen method for making Ricotta...then skip down the the Ricotta Salata!

Ricotta Cheese
from jam it, pickle it, cure it by Karen Solomon
yield: 1¼ c.

8 c. whole milk
1 tsp. citric acid
¼ c. water
2 Tbs. half & half
1 tsp. kosher salt

Pour milk into saucepan.  In small bowl, dissolve citric acid in water, then add it to the milk and set over medium heat.  Stir to distribute the acid evenly.  When temperature of milk reaches 190° F (~15-20 mins.), turn off the heat.  Do not stir or disturb the milk and let sit for ~10 mins. to allow curds and whey to separate.

Gently strain solids from the liquids in a fine mesh sieve.  Don't press or squeeze at all.  Once most of liquid has dripped out, move the curds to a bowl and toss with cream and salt.

Store, covered, in refrigerator for up to 1 week.
fresh Ricotta is loose like this photo credit

NOW that you have fresh Ricotta cheese....let's turn it into Ricotta Salata!

Ricotta Salata
from jam it, pickle it, cure it by Karen Solomon
yield: 1 (6-8 oz) cheese

1 1/4 c. Ricotta Cheese Curds
4 tsp. kosher salt, or more if needed

Pour the cheese curds into a cheese press and press at room temperature for 3-4 hours, until solid.  Once the cheese has come together, gently coat the exterior w/ 2 tsp.of the salt (or more), then wrap in a clean kitchen towel.  Place wraped cheese on a plate, and refrigerate for 2 days.

Remove cheese from fridge, rub with 1 more tsp. salt and replace cloth with a clean cloth.  Let sit another 2 days.  Repeat once more; cheese should be quite firm.

Once it's ready to eat, brush off as much of the salt as possible, and slice from center out-as you would a pie. Enjoy immediately.
Ricotta Salata photo credit
*Okay Forgers...Cheese on!  
Link up to the current month's linky post (which can always be found via link on sidebar) once you've made it and posted on your blog!

Wednesday, September 1, 2010

September 1st Round-Up! What we Forged in the August Heat..

Yeah, it has been hot! But that does not stop our intrepid Forgers - just look at what everyone made this month - great forging!

August

Ap269 made some glorious cultured butter and fell madly in love with fresh buttermilk.

And she also made some homemade cottage cheese with Tuscan herbs, yum!

And, on a roll, Ap269 also made some delicate Brousse - and check out the delicious potato cakes on her post!

Poppyseed took a break from her peach-fest to make creamy yogurt cheese. Beautiful!

My partner in crime, Heather, made three delicious variations of the cultured butter.

Elizabeth made yogurt cheese to go with her delicious grape pie and it is making me very hungry.

Try, try, again - Ree made some gorgeous feta!

Lexi made garlic bread with her homemade cultured butter!

Foodycat delighted us with fresh cultured butter on homemade cherry and buttermilk scones.

I (Natashya) loved the whole cultured butter making experience!

Rebecca made homemade cultured butter, and came up with inventive ways to agitate the cream!

Veena made some delicious oregano cultured butter for her daughter.

Thanks, everyone, for forging with us, can't wait for September's challenge!


*A note*

It occurs to us Forging Fromage Folk that now that we have the super-handy-way-cool-linky-with-photo .. that the monthly round-up is a little redundant. Let's let the linky do the work for us, so we can spend more time drinking eating forging!

forgingfromagebutton2

September '10...What did you FORGE this month?

This is the spot to link up any current or past FORGES!!!

Current Cheesy Challenges:

Ricotta Salata (and in turn, Ricotta!)

Remember, we always welcome your links to any of the things we've forged in the past. For a list, check out the sidebar! 

Please link back to either the posted challenge you've completed or to the Forging Fromage main page.  We have buttons on the sidebar if you'd like to add one of those to your post or your sidebar.  Don't be shy...join in at any time!

Please be sure to leave a comment after adding your link, so that we know you've linked up.  

Linky will be open until the last day of the month 11:59 pm Eastern time!

CHEESE ON!


This linky list is now closed.

Monday, August 2, 2010

August Cheesy Challenges - Colby and Cultured Butter!

Happy August everyone! Can you believe that summer is winding down?
We have two cheesy challenges this month, or dairy challenges I should say. One long term project - Colby Cheese and one short-term challenge - Cultured Butter!
It's going to be a fantastic and dairy-licious month, Heather has set up a thumbnail linky for all your cheesy challenges for August here.
Recipes are below, use the ones we provide or your own. Happy Cheesing!


Colby Cheese
Glengarry Cheesemaking
Batch size: 12 litres (milk)
Expected yield: 1.2 kg
Milk source: Whole milk, raw or pasteurized
Production time: 2 and ¾ hours

Warm milk to 30 degreesC.

Add ¼ tsp of annatto cheese colorant diluted in ¼ cup of cool water to the milk. Mix in well using the top and bottom stir technique.

Add 200 ml prepared mesophilic starter culture or ½ tsp of powdered culture directly into the milk pre-mixed in a little milk from the cheese pot. Mix in well.

Allow the milk to ripen for 1 hour at 30 C, using the warm water bath to ensure constant temperature.

Add 1 tsp of liquid rennet diluted in ¼ cup of cool water mixing well into the milk using the top and bottom stir technique. Maintain temperature at 30C during renneting. The milk should set in 30-45 minutes.

Test the curd for a clean break, then proceed to cut the curd into ½ inch cubes. Stir gently while reducing the curds and at the same time proceed to cook the curds over the next 40 minutes to reach a temperature of 40C. Stir during the entire cooking process to avoid matting of the curds. The curds will reduce in size to the equivalent of half a peanut. Once the final cook temperature has been achieved, hold the curds at this temperature for 15 minutes.

Proceed to "wash" the curds by removing whey until you have reach the levels of the curds. Replace the whey with warm tap water at the same temperature as the whey (40C). Stir the curds gently so that they float freely in the whey/water mixture. Hold them in the diluted whet for another 15 minutes.

Allow the curds to settle to the bottom of the pot and then drain them in a cheesecloth lined colander. Drain for approximately 5 minutes.

Transfer the drained curd to a lined hoop press and press moderately for 1 hr.

Remove the cheese from the press and dress the entire cheese with cheesecloth. Press firmly for 12 hrs or overnight.

Remove the cheese from the press and float it in heavy brine for 24 hrs. Heavy brine consist of 6 cup of coarse salt in 4 litres of boiling water.

Remove the cheese from the brining pail and air dry at room temperature until the cheese rind feels dry.

Coat the cheese with cream wax and transfer it to a ripening area for at least 4 weeks. Hard wax this cheese approximately 2 weeks after production date. This cheese will not get excessively sharp if ripened longer. Ideal ripening conditions are 10-12 C with relative humidity of 75-90%.

This is a wonderful grating and melting cheese and it combines well with other cheeses to create nice blend flavors. It is a very good cheese for beginners to make as it can be eaten soon after production. The flavor is related to the taste of a mild cheddar.


And for our second dairy adventure this month, we are joining in with Gaarp in making Cultured Butter! If you are on Facebook, you can also join in the cultured butter party here.
Cultured Butter
Ingredients
  • One quart heavy cream
  • 1/3 cup whole milk yogurt (make sure whatever you use doesn’t contain any gums or stabilizers)
  • Salt, to taste
Directions
  1. Mix the cream and yogurt in a clean glass or ceramic bowl. Avoid plastic, which can harbor bacteria in any scratches or imperfections. Cover and let rest for 12 -18 hours, until the mixture has thickened slightly and tastes somewhat tangy. If your room is cool (i.e., less than the mid-70s), it may take longer to culture.
  2. Once the mixture has cultured, cool it slightly by placing in the refrigerator for an hour or so, or by submerging the bowl in a sinkful of ice water for a minute or two. The ideal temperature is around 60° F.
  3. Prepare a bowl of ice water, which you will use to clean the butter.
  4. Put the cream mixture in a mixing bowl. If using a stand mixer, use the whisk attachment. Beat the mixture on high until stiff peaks form, then reduce the speed to low. Watch closely at this point, as the cream mixture will soon break, separating into butter and buttermilk. If you have a splash guard on your mixer, you might want to use it so you don’t have buttermilk flying everywhere. Once the mixture breaks, turn off the mixer.
  5. Pour the buttermilk into a clean container. You can use this just as you would commercial buttermilk for drinking or baking. If you aren’t going to use it within a week or so, it can be frozen and used later for baking.
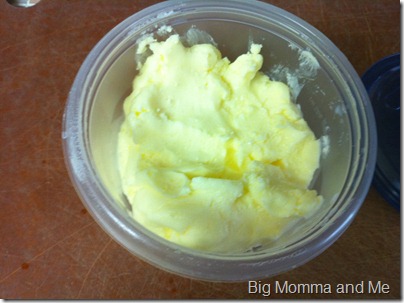
  6. Press the butter with a spatula, spoon, or your hand to remove as much buttermilk as possible.
  7. Pour water from the bowl of ice water over the butter to cover. Rinse the butter by kneading it under the water, then dump off the water. Continue to add water and rinse until the water you pour off is clear. It is necessary to remove all the residual buttermilk in order to keep the butter from spoiling too quickly.
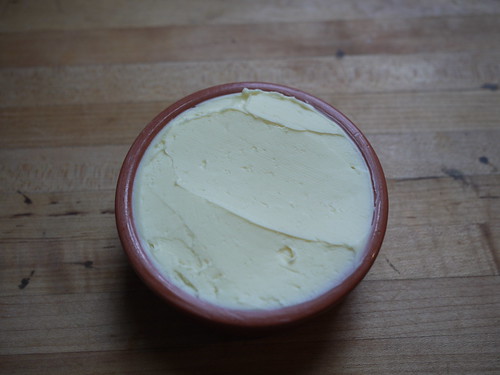
  8. Once the butter has been cleaned thoroughly, knead it on the counter for a minute. If you want to salt the butter, press the butter out on the counter, sprinkle lightly with salt, then knead it in. To store the butter, you can press it into ramekins or, as I prefer, roll it into logs. Cover the ramekins or wrap the logs tightly in plastic wrap. If you make two butter rolls, you can freeze one for later use.
Yields two cups buttermilk and about 12 ounces butter.


forgingfromagebutton2

Sunday, August 1, 2010

AUGUST '10 ...what did you forge this month!?

This is the place folks! 

Have you attempted, made, and blogged any of the current or past Forging Fromage challenges?  If so, simply add the perma-link to your post from August at the bottom of this post.  We'll round 'em all up at the beginning of September and then get cheesy all over again!

  Forge On, cheesy ones!


*Please leave a comment once you've added your link...we don't want to miss anyone!


This linky list is now closed.