Showing posts with label recipe. Show all posts

Thursday, November 4, 2010

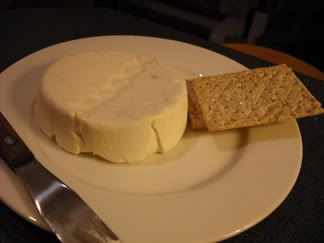
Our November Cheesy Challenge: Queso Fresco

With the holidays dominating most of our time for the next couple of months, we've decided to keep the cheesin' simple and go with another fresh cheese this month...and we're heading to....
...and who better to take us there than my kitchen idol, Mr. Rick Bayless himself?  Yup, his newest book Fiesta at Rick's has a fabulous recipe for Queso Fresco...one of my favorites and staple in our house at all times.  I must admit, though...I haven't made my own in quite some time.  Better get back to it...there's nothing like it!
*Bayless notes that he likes to use the buttermilk in this recipe as a starter...to let the milk culture for a few hours before moving on to the cheesing process.  The flavor reminds more of the artisanal cheeses that he knows and loves.  Good enough for me! BUT, if you don't have the time...or the buttermilk...then you may skip this step.  And I imagine sacrifice some depth.

Queso Fresco
from Fiesta at Rick's by Rick Bayless
makes ~1 lb.

1 gallon whole or 2% milk (remember, the richer the milk/flavor, the better the cheese)
2 c. buttermilk
1 tsp. Citric Acid (sometimes called sour salt, sometimes found in kosher section of grocery stores)
OR
1 c. fresh lime juice
1 tsp. salt (pure, fine-ground sea salt works best)

1. Culture the milk.  Pour milk into a very large pot over med-low heat.  Stir in buttermilk.  Bring milks to 75° F, turn off heat, cover pot and let sit for 3 to 4 hours.

2. Set the curd.  If using citric acid, stir it into ¼ c. cold water, continuing to stir until dissolved.  With lid off pot, turn heat to medium and stir dissolved citric acid or lime juice into milk mixture.  You will immediately see small curds start to form.  Every couple of minutes, stir slowly, gently, & thoroughly over entire bottom of pot until milk reaches 195°F, ~20 minutes.  At this point the curds will be very obvious, floating in the milky-transparent whey.  Remove from heat, let stand five minutes without stirring so all the curd can rise to the top.

3.  Drain the curd from the whey.  Wet a large piece of cheesecloth and line a large colander with it.  Set colander in sink (or over bowl if saving the whey).  Carefully ladle all of the curd into the colander. Gather the cheesecloth around the curd and gently squeeze to expel a bit more whey.  Unwrap curd onto a plate, break it up, and sprinkle w/ the salt...working it in with a spoon or your fingers.

4.  Gather the cheese curds into a 1" thick disk, transfer to a plate, cover, and refrigerate until thoroughly chilled.

...and can I just add...THEN GO USE IT IN A FABULOUS MEXICAN RECIPE!  Or sprinkle it on tacos, tostadas, enchiladas, gorditas...you name it!  I cannot get enough Queso Fresco!

As always, if there's a different Queso Fresco recipe you'd like to use, then please do so.  Link up your posts (or any past forges) to this months linky, which you can find through the sidebar, in the top rh corner!  

Cheese on, Forgers!

Saturday, July 10, 2010

Assignment: Yogurt Cheese!

Hi all!!  Did you think we left you in the lurch with two semi-tough assignments (gouda & cheddar)?  Not to worry.  For those of you still a bit nervous about making your own cheese...and those who want to forge something between lengthy assignments, we promised we'd keep adding some quicker/beginner cheeses to the mix!!  And this assignment couldn't be any simpler...Yogurt Cheese.  All you need to make it is...can you guess?...yup, yogurt!  Well, yogurt and a few various odds and ends for draining and forming.  This recipe comes from my new favorite book jam it, pickle it, cure it.  Seriously, this book is my new boyfriend.  I can't get enough of it!

The books author, Karen Solomon, says "Yogurt cheese- sometimes called strained yogurt, Greek yogurt, or labneh- is a sharper alternative to cream cheese, but it has a similar consistency and thus can easily take its place atop bagels or toast, stirred into mashed potatoes, or plaing the starring role in cheesecake.  Other attributes of this cheese include its utter simplicity to make, all the health benefits of yogurt, and a tangy personality."

Yogurt Cheese
adapted slightly from jam it, pickle it, cure it by Karen Solomon

1 (32-oz.) container plain yogurt

Instructions: Line a large bowl with a clean, think cotton or linen towel, positioning the middle of the towel in the bottom of the bowl.  Pour the yogurt into its center.  Gather together all 4 corners of the fabric and twist lightly; cloudy whey should be leaking out of the bottom.  Tie the bundle up securely and hang over a large bowl or the sink.  Let hang, undisturbed for at least 8 hours or overnight.

You'll end up w/ ~12 oz. of whey in the bowl and a very thick, spreadable tangy cheese in the cloth.  Transfer cheese to small container w/ lid.  Refrigerate covered for up to 2 weeks.

Variations:
Lemon Yogurt Cheese: Add 1 tsp. kosher salt and the juice of 1/2 lemon to cheese.
Garlic Yogurt Cheese:  Add 1 clove garlic, minced, and 2 Tbs. fresh chopped dill to cheese.
Chive and Black Pepper Yogurt Cheese:  Add 2 Tbs. fresh chives and several grinds of fresh black pepper to cheese.
Cranberry and Green Onion Yogurt Cheese: Add 1/4 c. chopped dried cranberries and 1 minced green onion to cheese.

Here is Karen herself showing just how easy it is...seriously, the video is under a minute....


So, no excuses okay?  It doesn't get much easier than this...come forge with us!  Feel free to ask any questions about any cheese or process either in the comment section of that cheese assignment or by email. Since this is sooooo easy, it'll be due July 30!

*Also, we're gonna try something new.  We're going to add a linky at the bottom of each assignment post.  If you've made the cheese and posted it, please add the link to the bottom of the appropriate post.  We'll still do roundups for each assignment...this'll just make it easier to submit your cheesy adventures!  Also, please leave a comment once you've linked up so we know to head over and check out what you've done!  But, you are alway welcome to email in your link if you do not have a blog or if you can't figure out the linky.


This linky list is now closed.

Friday, July 2, 2010

July's Cheesy Challenge - Cloth-Banded Cheddar!

Image from MyRecipes.com

That's right, this month's cheesy challenge is Cheddar! Time to roll up our sleeves and conquer that perennial favourite - let's show cheddar who's boss!
From Wiki:
Cheddar cheese has been produced since at least 1170. A pipe roll of King Henry II from that year records the purchase of 10,420 lb at a farthing per pound (£3 per ton). One suggestion is that Romans brought the recipe to Britain from the Cantal region of France, where it was adapted. Cheddar cheese traditionally had to be made within 30 miles (48 km) of Wells Cathedral.
Cheddaring refers to an additional step in the production of Cheddar-style cheese where, after heating, the curd is kneaded with salt, then is cut into cubes to drain the whey, then stacked and turned. Strong, extra-mature Cheddar, sometimes called vintage, needs to be matured for up to 15 months. The cheese is kept at a constant temperature often requiring special facilities. As with production of other hard cheese varieties in other regions worldwide, caves provide an ideal environment for maturing cheese; still, today, some Cheddar cheese is matured in the caves at Wookey Hole and Cheddar Gorge.
The curds and whey are separated using rennet, an enzyme complex normally produced from the stomachs of new-born calves (in vegetarian cheeses, bacterial-, yeast- or mould-derived chymosin is used).
Cloth-Banded Cheddar
adapted from Making Artisan Cheese, Tim Smith

Ingredients:
2 gallons whole milk (7.6L)
1/4 tsp mesophilic direct-set culture (2mL)
1/8 tsp calcium chloride diluted in 1/4 cup cool water (60mL)
1 tsp liquid rennet (5mL) diluted in 1/4 cup cool water (60mL)
2 tbsp cheese salt (I just use pickling salt) (30mL)

Prodecdure:
Heat the milk to 86F (30C), then stir in the starter, cover, and ripen for 45 mins. Add calcium chloride. Maintain 86F (30C), add the rennet to the milk and stir for 1 minute. Cover and let it sit at 86F (30C) for forty minutes or until you can get a clean break. Make one cut with a curd knife to test for a clean break.

Maintaining the target temperature, cut the curds into 1/4 inch (6mm) cubes, and let them rest for 5 minutes. Slowly heat the curds to 100F (38C), stirring occasionally to prevent the curds from matting. This should take thirty minutes. Once you reach the target temperature, hold for an additional thirty minutes, continuing to stir. Let the curds rest for 20 minutes at the target temperature.

Drain the curds into a cheese cloth-lined colander and let them sit for 15 minutes at room temperature. You now have a large block of curd. Cut the block into 1/2 inch (about 1cm) thick strips, and lay then in an 8"x8" (20cm x 20cm) cake pan in a crisscross pattern. cover with a kitchen towel, and put the cake pan into a sink filled with 100F (38C) water, to a depth that comes just to the top of the pan. Make certain that the water does not get into the pan. Keep the curds at 100F (38C). Rotate the curds top to bottom every 15 minutes for two hours. Be sure to drain the whey from the cake pan every time you flip the curds. By the end of the two hours, your strips should be smaller and tough, with a smooth, shiny finish on the sides. Tear your curds into 1/2" (about 1cm) pieces, and put them back into the pan. Cover and let them sit in the pan in the 100F (38C) water for an additional thirty minutes. Stir the curds frequently to keep them from matting.

Blend in the salt by hand, and let the curds rest for 5 minutes at room temperature.

Pour the curds into a 2-lb (900g), cheese cloth-lined mould. Press at ten pounds for 15 minutes.

Take the cheese out of the mould, and peel off the cheese cloth. Turn the cheese over, rewrap it in the cheese cloth, and press at forty pounds for 12 hours. Repeat this procedure, and press at fifty pounds for 24 hours.

Take the cheese out of the mould, and let it air-dry on a cheese board for two to three days. Turn the cheese several times daily to allow for even drying.

Yield - 2lbs. (900g)


Banding Cheese
Cloth banding is the traditional way to form a rind on Cheddar cheese. The advantage to cloth is that the cheese can breathe more effectively than when covered in wax, and proper breathing gives the cheese a richer, fuller flavour. Cloth banding is easy to do, and it gives your cheese an authentic look.

Procedure:
Place the cheese on a clean sheet of cloth, trace the top and bottom of the cheese, and cut out four circles that are each wide enough for the cheese cloth to cover the sides of the cheese. Rub a thin coat of vegetable shortening on the cheese, covering the entire cheese. Lay the cheese cloth on the top and bottom of the cheese, adhering to the shortening. Repeat the process, layering a second coat of shortening between the two layers cloth.
Cover with the second layer of cheese cloth, and rub the fabric smooth to form a solid seal. Ripen at 55F (13C) for three to six months at 80-85% humidity, turning weekly.

Artisan Advice
The process of cheddaring occurs when the cheese maker takes the mass of drained curds, lays them out flat, cuts them into blocks, and then stacks them on top of each other. Over time, the curd blocks will shrink in size and become firm in texture as they continue to lose whey. The end result is a cheese renowned for its flaky texture and pleasantly tangy flavour.


So!
You may have noticed that this is a cheese that takes some time. I won't announce a finish date for the Cheddar at the moment, we will keep in touch in the comments and see how everyone is coming along with this challenge and decide together when we are ready to unwrap our treasures. Get started as soon as you can, so we are all cheddaring together. We will do other dairy challenges in the mean time whilst the cheddar rests.

Don't forget, we are still working on June's Gouda! Using the recipe we provided or your own, email in your gouda challenge by July 31st.

*Not too many of us have pro equipment. I personally use a slow cooker for my heating and tend to use whatever I can find for pressing. I am thinking of hitting up the Home Depot this month to see if I can find some good shapes in the plumbing supply section to make homemade moulds out of. Cheesing can be creative business.
Please let us know any tips and tricks that you have come across in your home cheese-making or if you would like to write a guest post for Forging Fromage. (Involving cheese, cheese-making, or dairy of course!)

Happy Cheesing!

Sunday, May 16, 2010

Gouda AND Goat's Milk Feta...2 new cheesy adventures!


Yes, you heard me right...we are announcing 2 new adventures!  We talked it over a bit and decided that we were ready to move on to a more intermediate level in our forging.  Making fresh cheese was delicious...it was a great introduction and learning experience...but, we're ready to try our hands at something new and challenging and honestly, a bit scarey!  Wait.  You say you're just building up the courage to start cheesemaking?  You haven't taken the plunge and joined in any of our beginning forging yet?  Don't freak out!  We're still going to have a monthly beginner/fresh/easier cheesier (okay, not cheesier, just felt right) adventure, as well!  Since intermediate level cheeses can require more time to finish, we thought we'd make those "due dates" individual to each cheese while still having a simpler monthly challenge!  By the way, have you checked out our adventures in Halloumi!?

Shall we begin with our "harder" cheese?  Okey dokey...I'd like to give a warm welcome to one of my personal favorites...Gouda!  This is a recipe that I found on the internet...the one I'm going to have a go at.  Feel free to use this or any other Gouda recipe you wish.  I'm hoping I actually get the opportunity to smoke it, as well...ahhhhh, smoked gouda...how I love thee...dream of thee...  "Gouda is a yellowish Dutch cheese named after the city of Gouda. The cheese is made from cow's milk that is cultured and heated up until the curds separate from the whey."*

Gouda (a semi-hard cheese) DUE: JULY 30
found at gourmetsleuth

1 gallon Milk
4 oz. 1/8 tsp.* Mesophilic Starter Culture  *see comment section!!
1/4 tab rennet (or 1/4 tsp liquid rennet)
Warm the milk to 85 F (29.5 C).

Add 4 oz of mesophilic starter culture and mix thoroughly with a whisk, the culture must be uniform throughout the milk.

Dissolve 1/4 tab rennet into 3-4 tablespoons COOL water. Hot water will DESTROY the rennet enzymes.

Slowly pour the rennet into the milk stirring constantly with a whisk.

Stir for at least 5 minutes.

Allow the milk to set for 1-2 hours until a firm curd is set and a clean break can be obtained when the curd is cut.

With a long knife, cut the curds into 1/2 inch cubes.

Allow the curds to sit for 10 minutes to firm up.

Slowly raise the temperature of the milk to 102 F (39 C). It should take as long as 45 minutes to reach this temperature. During this time, gently stir the curds every few minutes so they don’t mat together.

Once the curds reach 102 F (39 C), allow the curds to settle, then carefully remove 3 cups of whey from the top surface.

Replace the lost whey with 3 cups of 102 F (39 C) water.

Cook the curds at 102 F (39 C) for another 45 minutes. Every 15 minutes remove 3 cups of whey and replace with 102 F (39 C) water.

At the end of the process, you will have removed whey three times.

Drain the whey by pouring through a cheesecloth lined colander.

Carefully place the drained curds into your cheesecloth lined mold.

Press the cheese at about 20 lbs. (9 kg) for 45 minutes.

Remove the cheese from the press and flip it.

Press the cheese at about 40 lbs. (18 kg) for 3 hours.

Remove the cheese from the press, careful it is still very soft.

Float the cheese in a COLD brine solution** for 3 hours. Be certain to flip the cheese over every 45 minutes or so to ensure even rind development.

Pat dry the cheese, you will notice the outer surface has begun to harden.

Place the cheese in your refrigerator to age for 25 days. You will need to flip the cheese over every day or it will dry unevenly.

-If too thick a rind begins to develop, place an overturned bowl on top of the cheese, or place it in a covered container. However, continue to turn the cheese daily and do not wrap it in plastic.

-Inspect daily for mold. Should mold develop on the cheese surface, simply remove it using a paper towel dipped in white vinegar.

-At the end of 25 days you can age it further by waxing it or you may use it immediately.

-If you wax the cheese, continue to flip the cheese every 3 days or so.

** BRINE SOLUTION
Dissolve 1.5 cups of salt into one quart warm water.
Cool the brine in your freezer, some salt will precipitate out.
To use the solution, simply place it in a bowl and place your cheese into it.
After you are done with the brine, you can store it in a container in your freezer.
With each new cheese, you will need to add additional salt so that the solution is saturated.
The solution is saturated with salt when no additional salt can be dissolved no matter how long you stir.

That doesn't sound so bad.  Does it!?  I  hope you join us in taking this next step...but if not (or in addition to), our second adventure will be Goat's Milk Feta...again, use this or any recipe you choose... "Feta is a classic curd cheese in brine whose tradition dates back to Greece thousands of years ago. It is traditionally made exclusively from goat's and sheep's milk, but cow's milk varieties are readily available in some areas."*

Goat's Milk Feta (a fresh cheese) Due: June 29
from The Home Creamery
yield: ~1 lb.

1 gallon goat's milk
1/4 c. cultured buttermilk
1/2 tsp. liquid rennet
1/4 c. cool water (55-60 degrees F)
coarse salt

1. Warm the milk to 88 degrees F over low heat in a large, heavy-bottomed pot.  Check the temp. with a thermometer.  Stir in the buttermilk.  Cover and let stand for 1 hour.  Remove the pot from heat.

2.  In a small cup, dissolve the rennet in the water.  Add this mixture to the milk and stir for 30 seconds.  Remove the pot from the heat, cover, and let stand for 1 hour longer to coagulate.

3.  Using a knife, cut the curds into 1" cubes.  Stir gently for 15 minutes, keeping curds at 88 degrees F. 

4.  Pour the curds carefully into a butter muslin-lines colander, tie together the ends of the muslin to make a bag, and hang in a cool room or in the refrigerator to drain for 4-6 hours.

5.  Remove the cheese from the muslin, slice the cheese ball in half, and lay the slabs of cheese in a dish that can be covered.  Sprinkle all the surfaces with coarse salt, cover, and allow to set at room temp for 24 hours.  After 24 hours, salt all the surfaces again and let the cheese rest for 2 hours.

6.  Place the cheese in a covered dish and refrigerate up to 2 weeks of freeze for future use.

BEST OF LUCK, FORGERS!!!  EMAIL US A LINK TO YOUR POST ON EITHER OF THESE BY THEIR DUE DATES AND THEN WATCH FOR THE ROUND-UPS SHORTLY FOLLOWING THOSE DATES!


*Source: CrosswordEase

forgingfromagebutton2

Saturday, April 3, 2010

Are Your Ready for April's Cheesy Challenge? Halloumi!

Photo of Grilled Halloumi Cheese - Squidoo.com

After exploring lots of easy and delicious fresh cheeses lately, we have stepped up the challenge this month - and are making Halloumi!

Halloumi - Wiki

Halloumi or haloumi (Greek χαλούμι, Turkish hellim, Arabic حلوم ḥallūm) is a traditional Cypriot cheese that is also popular in the rest of the Middle East and Greece, and is now made the world over. It is made from a mixture of goat's and sheep milk, although some halloumi can be bought that also contains cow's milk. It has a high melting point, and so can easily be fried or grilled. Halloumi is set with rennet, and is unusual in that no acid or acid-producing bacterium is used in its preparation.


Cypriot halloumi

Halloumi cheese originated in Cyprus and was initially made during the Medieval Byzantine period, subsequently gaining popularity throughout the rest of the Middle East region. Industrial halloumi contains more cow's milk than goat and sheep milk. This reduces the cost but changes the taste and the grilling properties.

The cheese is white, with a distinctive layered texture, similar to mozzarella, and has a salty flavour. It is stored in its natural juices with salt-water, and can keep for up to a year if frozen below −18 °C (0 °F) and defrosted to +4 °C (39 °F) for sale at supermarkets. It is often garnished with mint to add to the taste. Traditionally, the mint leaves were used as a preservative, the use serendipitously discovered when the fresh Halloumi was kept wrapped for freshness and flavour from the mint leaves. Hence, if you look closely, many packaged Halloumi will have bits of mint leaf on the surface of the cheese.

It is used in cooking, as it can be fried until brown without melting due to its higher-than-normal melting point, making it a good cheese for frying or grilling (such as in saganaki), as an ingredient in salads, or fried and served with vegetables. Cypriots like eating halloumi with watermelon in the warm months, and as halloumi and lountza - a combination of halloumi cheese and either a slice of smoked pork, or a soft lamb sausage.

The resistance to melting comes from the fresh curd being heated before being shaped and placed in brine.Traditional halloumi is a semicircular shape, about the size of a large wallet, weighing 220-270 g. The fat content is approximately 25% wet weight, 47% dry weight with about 17% protein. Its firm texture when cooked causes it to squeak on the teeth when being consumed.

Traditional artisan halloumi is made from unpasteurised sheep and goats milk. Many people also like halloumi that has been aged; it is much drier, much stronger and much saltier. It is easy to find this traditional product in shops. It is kept in its own brine. This cheese is very different from the milder halloumi that Western chefs use as an ingredient.

Although it is made worldwide and is of rather disputed origin due to the mixed cultures in the Levant and East Mediterranean, halloumi is currently registered as a protected Cypriot product within the US (since the 1990s) but not the EU. The delay in registering the name halloumi with the EU has been largely due to a conflict between dairy producers and sheep and goat farmers as to whether registered halloumi will contain cow’s milk or not and if so, at what ratios with sheep and goat’s milk. If it is registered as a PDO (Protected designation of origin) it will enjoy the same safeguard as 600 or so other agricultural products such as feta and parmesan cheese.

Halloumi
- Making Artisan Cheese, Tim Smith

Ingredients
2 gallons whole milk
1/4 tsp mesophilic direct-set culture
1/8 tsp calcium chloride, diluted in 1/4 cup cool, unchlorinated water
1/2 tsp liquid rennet, or 1/4 tab dry rennet diluted in 1/4 cup cool, unchlorinated water
1/2 cup cheese salt
Brine solution*
1 tsp dried mint, rehydrated in 1/2 cup boiling water

Procedure

Heat the milk in a double boiler to 86F (31C), then add the starter culture and blend for two minutes.

Maintaining the target temperature of 86F, add the rennet & calcium chloride, stir for one minute, and let rest for forty minutes, or until a clean break. To test for a clean break, use a curd knife to make one cut through the curds.

Cut curds into 1/2" (about 1cm) cubes, trying to keep them as uniform as possible.
Slowly heat curds to 104F (40C); this should take forty-five minutes. Continually stir the curds to keep them from matting. Once the curds reach target temperature, maintain the curds at that temperature for an additional twenty minutes while continuing to stir.

Drain the whey off curds into a cheese cloth-lined colander that is set in a catch bowl. Reserve the whey.

Blend mint into the drained curds with a spoon. Pour the curds into a 2-pound (900g) cheese cloth-lined mould. Fold a corner of the cheese cloth over the curds, and press at thirty pounds for one hour. Remove the cheese from the mould, and unwrap the cheese cloth. Turn over the cheese, and rewrap it with the cheese cloth. Press at forty pounds for one hour. The cheese should be firm with a spongy consistency.

Heat the reserved whey in a pan to 190F (88C). Take the cheese out of the mould, and cut it into 2" (5cm) thick strips. Put the strips into the heated whey, maintaining the target temperature for one hour.

The cheese should have a thick consistency. Drain it into the cheese cloth-lined colander, and let it rest at room temperature for twenty minutes.

Coat the cheese with 1/2 cup (145g) of cheese salt, and let it rest for two hours at room temperature.

Yield - 2 pounds (900g)


Notes
Use this or any recipe that you like for halloumi
Leave milk out of fridge for a couple of hours before starting the cheese-making.

Brine Solution
A brine is a supesaturated solution of salt and water, in which cheeses are literally bathed. (Brine solution consists of 2 pounds (905g) of salt stirred into and dissolved in 1 gallon (4.5 l) of water, heated to 190F (88C).
The types of cheeses that are usually brined are hard cheeses, such as Gouda and Emmental.
Brining occurs directly after a cheese is removed from the press. The cheese is literally dunked into this salty bath. Once in a the brine, the cheese begins to absorb salt, and the proteins begin to harden and form the rind.

This is a big one, lots of luck to all of us for mastering Halloumi!!

forgingfromagebutton2

Tuesday, March 2, 2010

March's Cheesy Challenge - Brousse!

Brousse is a fresh Provençal cheese made from goat's milk in some areas and sheep in others. It looks to be similar to a cross between chevre and ricotta. Traditionally it is eaten with honey or fresh herbs.

Photo from socialearth.org

Brousse
adapted from 200 Easy Homemade Cheese Recipes

Tools
Cloth-lined colander
4 Brousse moulds

Ingredients
1 quart goat's milk (sheep is fine too)
1/4 cup white vinegar

1. Sterilize all equipment. In a stainless steel pot over medium heat, bring milk just to the boiling point, stirring gently to prevent scotching. Remove from heat.

2. Dilute vinegar in 3/4 cups cool water and add to milk, stirring quickly with skimmer. Continue to stir milk vigorously with skimmer or a whisk until it curdles and small flakes of cheese rise to the top of the pot.

3. Using skimmer, ladle curds into a cloth-lined colander. Let drain over a bowl for 2-3 minutes. Using your hands or a spoon, fill Brousse moulds, packing curd down. Pour remaining milk through a cloth to starin out any remaining solids and add these to the moulds. Tap moulds slightly to ensure they are completely filled to the bottom.

4. Place moulds in a basket or bowl so they stand upright. Let drain for about 6 hours. Place in the refirgerator and unmould cheese as you use them. Brousse must be eaten fresh, preferably within 24 hours.* Other sources say 3-4 days is fine

Notes
I don't have Brousse moulds and have no idea where to look for them. I think moulds could be fashioned from small plastic containers, perforated, and lined with cheesecloth. I might use my small coeur a la creme moulds.

We chose this recipe as it does not require harder to find ingredients for cheesemaking - but we are interested in what you might have access to.

Can you get your hands on:
Liquid rennet?
Rennet tabs?
Starter cultures? Which kinds?

There are many cheesemaking suppliers on the web, please let us know what you have access to and any cheeses you would like to try making in the future. Also, if you have any relevant cheesemaking links for the sidebar please send them along (and note which country they are from). We want to make cheesemaking accessible to everyone!

So, is everyone ready to make Brousse this month? Fantastic!! Can't wait to see your cheesy creations and how you serve it. Our Forging Fromage email address is on the sidebar - write to us with your finished product or with any questions or information you might like to share.

Happy Cheesing!
forgingfromagebutton2

Tuesday, January 26, 2010

Guest Post from Foodycat!

Foodycat has graciously allowed us to post her recent cheese adventures here on Forging Fromage. We are so impressed with her homemade cheese exploits!

I'm inspired. For a while now I have been reading on Natashya, Heather and Simona's blogs about their forays into homemade cheese making. It has all sounded amazing and wonderful and I decided that I really had to have a go at it. I ordered some supplies from Leeners, bought a couple of litres of full-fat goats milk from the supermarket and got stuck in.

I

started with these recipes, following the method for cheddar because it sounded the most achievable. I didn't have the right sized mould for making a single cheese, so I used egg rings, lined with scalded cheesecloth and set in my bamboo steamer. 2l of milk made 4 cheeses. The curds didn't set up as firmly as I was anticipating, so I abandoned the idea of pressing them into a hard cheese, and just went where I was led, into a soft goats cheese.

After 2 days draining I turned them out of their moulds, onto a fresh piece of scalded cheesecloth, and let them mature for another 4 days before we sampled one. Isn't the pattern from the bamboo steamer pretty? It was delicious. Very mild and creamy, goaty but not intensely so and with an unmistakeable "cheese" texture - it definitely wasn't yoghurt. It had grown up.

The intention was to let the other 3 cheeses mature for longer to see how the flavour developed, but sadly they developed a nasty mould and had to be chucked. Oh well - for a first attempt I was happy!

Of course, when you make cheese at home, you end up with a lot of whey. In a lot of areas (well - Stilton and Parma) a thriving dairy industry has also led to a thriving pork industry, as they whey is fed to the pigs and they grow fat and flavoursome. But I don't have a pig.

The last scoop of the goats curd (which didn't fit into the moulds) and a little of the whey went into my blood orange syrup cakes instead of yoghurt.

The rest of the whey went to make ricotta. Now, making ricotta this traditional way is very, very low yield. But since it takes no effort and it is really a bonus yield from the cheesemaking, I wasn't too bothered. Remember I started with 2l of milk, got 4 x 10cm cheeses and 200ml of goats curd for my cakes. The 1/2 cup of lovely fresh ricotta was eaten almost straight away, in this pasta with artichokes dish. It was seriously delicious, but I kept thinking that it'd be even better in summer with fresh baby courgettes substituted for the artichokes.

So THEN the whey drained from the ricotta needed a home. Oh yes - I was very keen to make this milk go as far as possible! 1/3 cup went into the syrup for the orange syrup cakes - it added a slight tang and richer flavour than a plain citrus syrup. Some went into the freezer - I hear it makes a good marinade for meat - and some went into a version of this buttermilk syrup (I say "a version" because I used twice the amount of whey as the recipe calls for buttermilk, no corn syrup and no baking soda). Then THAT syrup went into this spelt porridge, which I portioned up and took to work for breakfast.

Spelt Porridge

250g pearled spelt
250ml water
1/4 cup golden flax seed
1/4 cup dessicated coconut
375ml whey syrup
60g dried cranberries
80g dried figs, cut into quarters
100g hazelnuts, roughly chopped

Combine ingredients in a heavy bottomed pan. Bring to the boil, cover and simmer gently on a low heat for about 1/2 hour, stirring frequently, or until it is thick and gelatinous and the spelt is tender. Serve hot, with extra cold milk poured over. It's very filling and sustaining.

A Guest Post by Foodycat.

Tuesday, December 29, 2009

Featured Forger: Mirch Masala makes Paneer

Yesterday I came across a fabulous home cheese making post over at Mirch Masala...and the incredibly talented Superchef was kind enough to allow me to share it here at Forging Fromage!
----------------------------------------------------------------------------------------------------------------------
Paneer / Cottage Cheese, the most versatile ingredient in Indian, especially vegetarian cooking is easily available in all Indian grocery stores. So, why bother making it at home??! Well, there are a couple of good reasons, at least for me. First of all, the ones that you get in stores has this rubbery texture to it. Even though you can live with it, the homemade paneer has a different fresh texture and taste and absorbs the flavour better than the store bought ones. Now especially with paneer, which doesn't have any particular taste to it, this is a very important factor. Second is the cost factor – you will easily spend 6-7 bucks for a block of paneer where as a similar quantity can be made at home with about a gallon of milk which is anywhere between 2-3 $. I know, I know its not a HUGE difference. But don't you feel good when you get better quality and better tasting product for lesser price and the best thing is the satisfaction of making paneer at home! Hope at least some of you agree with me :)You will need:
1/2 gallon 2% milk – whole milk will be better
2 oz (1/4 cup) distilled white vinegar ( you can use equal amount lime/lemon juice also)

A heavy bottomed pan
a colander
cheese cloth, to strain
heavy pans/canned food/other heavy things as weightsHeat the milk in a heavy bottomed pan/cast iron pan on medium heat. Keep stirring so that the milk doesn't stick to the bottom of the pan. Just when the milk starts steaming and just before it comes to a boil, add the vinegar to it. The milk will curdle and you will see something like whats shown in the photo below.Now strain this on a cheese cloth spread over a colander. If you want you can collect the whey (the liquid part) for later use. Wait for sometime till the water drains out completely and then take out the cheese cloth. Place a plate or a chopping board in the sink, place the cheesecloth folded on top it. Place another plate and put some cans of food or a heavy pan on top of it as weights. After about an hour – hour and a half, remove the plates and weights and take out the block of paneer. Chop into small pieces and store or store as it is in the refrigerator for later use. Here are some recipes using paneer :

Paneer Makhani / Paneer Butter Masala – An Easier Version
Paneer Butter Masala on a Pizza
Palak Paneer
Paneer Pulao
---------------------------------------------------------------------------------------------------------------------
Um, yeah...awesome, right!? Thanks so much for sharing your Paneer making method with us, Manju! And believe me, if you don't visit Mirch Masala already...you will get lost in this fabulous world of spices n' more!!

Monday, December 7, 2009

Our Cheese Dairy-filled Adventure for the month of December is...

We figured since everybody is dealing with a little seasonal/holiday madness this time of year, it best to take it easy again. We chose Créme Fraîche this month...although it's not cheese, it is a dairy product, and we've decided to broaden our focus a bit to include other dairy gems such as this! Créme Fraîche translates to Fresh Cream. Are you familiar with it? It's thick, tangy and perfectly decadent! "It originated before the days of pasteurization, when refrigeration and fast transportation weren't available. The cream collected bacteria and fermented before it was able to make its way from French dairy farms to the markets. The French developed a taste for it and still enjoy the flavor today."* Um, me too. With an average of somewhere between 30-60% butterfat, is there any question why? I'm going to provide a recipe again, in hopes that we'll have a couple more people join us in our adventure this month...you don't have to use this recipe...but it's here if you need it! And who couldn't use a good container of this gorgeous cream to drizzle on their fish, poultry, vegetable and fruit on their holiday table? Finish a pan sauce with a blob for extra creamy richness. Throw in some herbs for savory dishes...or mix in some honey and vanilla to go with fruit! Top a baked potato or an omelet with a dab. Give it a go...you will be pleased!

Créme Fraîche
from The Home Creamery by Kathy Farrell-Kingsley (see sidebar to get your own copy)

1-2 Tbs. cultured Buttermilk
2 c. (1 pint) heavy cream do not use ultra-pasteurized (needs that good bacteria!)

1. Combine buttermilk and cream in medium saucepan and heat only to tepid (not more than 85 degrees F). Pour mixture into a clean pint jar. Cover partially and let stand at room temp (between 65-75 degrees F) for 8-24 hours or until thickened. Don't be scared of leaving it out...it is an essential step and so worth it. I've made it before. Really.

2. Stir and refrigerate for at least 24 hours before using. The cream will continue to thicken and develop flavor in fridge. It will keep for ~2 weeks.

We look forward to seeing your Créme Fraîche and what you've done with it this month! Once you've posted...or made and pictured...email us with a link or picture/text you'd like to be included in the roundup (by the end of the month). Forge!

*source The Home Creamery

Tuesday, November 17, 2009

Guest Post - Liptauer Cheese from Mary of One Perfect Bite


I read this post for a savoury and delicious cheese recipe on my friend Mary's site, One Perfect Bite. It is a great way to use the fresh cheese we have been making here at Forging Fromage, or even with store-bought cheese, and she has kindly agreed to let us reproduce her post here. Can't wait to try this recipe!

From the kitchen of One Perfect Bite...
I know that early exposure helps us develop an affinity for certain foods. It's the only plausible explanation for my love of Central European food. I had my first taste of Liptauer cheese at the age of 4 and we've had an improbable love affair ever since. Lipto is a fresh Hungarian cheese that's made with sheep's milk. It has a very soft consistency, but it's so mild that it's almost flavorless. That's taken care of by the addition of herbs and seeds and spices that are used to flavor the food of the region. A little paprika, a few capers and a spoonful of caraway seeds help move the bland to "bingo." When we lived in Chicago, Lipto cheese was just a bus ride away. It became harder to find in the suburbs of New Jersey and I haven't been able to find it at all where we now live. This cheese spread is popular in Slovakia and Italy , where it's called Spuma di formaggio all'ungherese, as well as in Austria and Hungary. It's almost effortless to make and it's wonderful for those occasions where beer is the beverage of choice. Liptauer cheese spread can be made with any soft cheese. Cottage cheese, cream cheese, quark, and soft goat or sheep cheese are all great substitutes for Lipto. The cheese is mixed with sour cream, butter, and finely chopped onions. Spices like ground paprika, fresh parsley, and bruised caraway seeds are added to the mix along with mustard and anchovies. The cheese is served with crackers or dark breads such as rye or pumpernickel. Some folks serve it with vegetables and others use it to stuff vegetables. All in all, it's an amazingly versatile spread. If you add two or three extra tablespoons of sour cream to the mix, it becomes a dip that's not at all bad with chips or pretzels. Liptauer takes 10 minutes to assemble, but it's flavor improves if it's allowed to sit for a few hours before serving. It will keep in the refrigerator for up to a week.


Liptauer Cheese Spread
from the kitchen of One Perfect Bite

Ingredients:
8 oz. of Lipto or cream cheese, softened
1/2 cup soft butter, softened
3 tablespoons sour cream
2 mashed anchovy fillets or 1 teaspoon anchovy paste
1 teaspoon capers
1 tablespoon finely minced onion
1 tablespoon prepared mustard
1-1/2 teaspoons sweet Hungarian paprika
1/2 teaspoon caraway seeds smashed or bruised to release flavor
1/2 teaspoon salt

Directions:
1) Combine cream cheese, butter, sour cream and anchovies in a small bowl. Mix well to combine.
2) Add capers, minced onions, mustard, paprika, caraway seeds and salt. Mix well.
3) Form a smooth mound. Make slight indentations in mound using tines of a fork. Sprinkle with paprika.
4) Refrigerate for at least 2 hours before serving. Garnish as desired. Yield 1-3/4 cups.


Remember, November's cheese challenge is Mascarpone!
*Email your cheese-filled adventures by the last day of the month.

Bonus
If you make this liptauer, or any special cheese spread or cheese ball, before the end of the year, feel free to write to us. Send in a picture and a link if you post it, and we will post an extra round-up in the new year. I think it would be a wonderful holiday appetizer.
Please direct any entries or questions...or just write to say howdeedoo...to forgingfromage at live dot com

Friday, November 6, 2009

Our Cheesy Adventure for November is.....

Yes...that is our cheese adventure for the month of November!!! This is so easy...2 ingredients!! I'm going to share the recipe that I will be using with you...it is from The Home Creamery by Kathy Farrell-Kingsley. Feel free to use any recipe you like, though.

4 cups (2 pints) heavy cream
1 Tbs. white wine vinegar


1. Pour the cream into the top of a large double boiler and slowly heat to 190 degrees F, stirring occasionally. Check the temperature with a thermometer.

2. Stir in the vinegar, and continue to stir until the cream begins to curdle. Remove the pan from the water, cover and let stand about 15 minutes or until the curds begin to firm.

3. Pour or ladle the curds into a butter muslin-lined strainer set over a large bowl. Let the curds cool completely, then cover and refrigerate for 24 hours to continue draining and to firm.

4. Discard the liquid and transfer the mascarpone to an airtight container. Refrigerate for up to 3 days. Stir well before using.

Okay, make it and blog it and send me your link by the last day in November!! Good or bad, success or failure...share with us your cheesy adventure! And remember, if the urge ever strikes to do a guest post about a particular cheesy subject here at Forging Fromage...just say the word...and it's done! Feel free to ask any questions or make comments about MASCARPONE in the comments at the end of this post...hopefully we can learn how to do it...and what not to do...together!

Saturday, October 17, 2009

The Accidental Farmer talks about Cottage Cheese

One of my visions for Forging Fromage was to bring in guest posters...people who have something to offer (I bet we all have a little something hidden away) by way of cheese knowledge. Home cheese makers, professionals, beginners, wanna-be's...every experience is potentially a learning experience, so please...if there's anything you'd like to talk about here, just let me know! Today, we are gonna be given a little lesson on making Cottage Cheese by Susan of The Accidental Farmer. Susan is a friend of mine who lives on and cares tirelessly for an organic farm with everything from veggies to chickens to (of course) dairy cows! She also makes my favorite lip balm of all time...has a booth at our local Farmer's Market...and now she blogs, too! One of these days, I'm going to ask her to bless us with a post filled with her fabulous insights on the benefits of Raw Milk...she's so much better at voicing it than I am! Remember, this month's Cheese Adventure is Cottage Cheese...so, if you'd forgotten, or are still searching for a recipe...Susan is giving us her tried and true method.

Susan's Cottage Cheese

I learned to make cottage cheese by reading several cheese making books and just diving in and trying it. After making several batches, I have devised my own cottage cheese recipe, using a little from this, a little from that, and a little that is all my own. However, this recipe most closely resembles the recipe for cottage cheese in Making Artisan Cheese: Fifty Fine Cheeses That You Can Make in Your Own Kitchen by Tim Smith. I do not use rennet in this recipe, but let time make the curd form. It makes a much more tender cheese. My recipe makes a little more than two pounds of cheese, but it can easily be halved. But you should still use the same amount of mesophilic starter culture, even if only making a half batch.

Equipment:
· A heavy bottomed two-gallon stock pot and a larger pot to make a double boiler

· An instant read thermometer (need to be able to read temps between 72º and 112º)


· A spoon for stirring (unless you are using the metal whisk – see below)


· A large metal whisk OR a long serrated bread knife OR a long frosting knife with a bend in it for cutting the curd


· Professional cheese cloth – you might find at a fabric store, or order from Dairy Connection.
~The stuff in the grocery store is too loose a weave – you will lose a lot of cheese!
~Butter muslin is too tight a weave. It will take forever to drain and it will be hard to wash the curds if you use it.
· A large colander
· A large bowl for mixing the finished product with salt

Wash and sterilize all of your equipment prior to use. Wash your hands frequently while you work. You are injecting the milk with special bacteria that will make great tasting cheese. The bacteria on your hands will not give you such great results.

Ingredients:
· Six quarts milk, preferably raw, most of the cream skimmed off and reserved
~ If it is pasteurized, do NOT use ultra pasteurized. Meijer's house brand was not ultra pasteurized the last time I looked.
· ¼ tsp. mesophilic starter culture – get from Dairy Connection or find a cheese maker who will give you a bit.

· Canning salt or flake salt (you can get flake salt from Dairy Connection, but canning salt works well, and you can buy that in about any grocery store.)

Process:
I made my own double boiler by putting a two gallon stock pot inside a three gallon stock pot. I have two Dutch ovens and four stock pots. And some days I wish I had a couple more. My stove is always busy!! I put the milk into the smaller pot and set it into the larger pot, into which I put about 3” of water. Water should come up the sides of the pot with the milk, to about 4” from the top. This creates a water bath and prevents the milk from scorching as you heat it. If you don't have two pots, then just remember to stand over the pot as you heat the milk! Scorched milk does not make good cottage cheese. I start with six quarts of raw milk. I skim most of the cream off the milk and put the cream in a pint jar in fridge. I'll use that at the end, adding it to make the finished cottage cheese creamier and richer. If using raw or unhomogenized milk, the cream will rise to the top while you are making the cheese and you will lose some of it. That's why I save it and add it back in after the cheese is made.

Heat your milk until it reaches about 72º. Add the mesophilic starter culture to the milk and incorporate it gently into the warmed milk with a wire whisk or large spoon. Then put a lid on it and forget it for about 24 hours. It should be somewhere where the temperature doesn't fall below 68º, although mine often does and it still seems to make good cheese.

After 20 hours or so (if your house is warm), tilt the pan slightly and see if the milk pulls away from the side of the pot. It will be kind of gelatinous. If so, you are ready to go to the next step. If not, let it sit a little longer. You shouldn't have to let it sit for more than 26 hours, though.
Now very gently cut the curd. You will do this either by cutting with a knife or by using the wire whisk. If you use the whisk, do not stir, but gently drag it through the curd to break it up into smaller chunks. If using either of the knives, first cut straight down making cuts about 1/4” apart. Then turn the pot 90º and cut straight down perpendicular to your first cuts. You should have 1/4” x 1/4” strips.
Now for the hard part (and why I use the frosting knife with the bend). Lay the knife as close to horizontal as you can and begin cutting horizontally to make 1/4” cubes of curd. I know, you are thinking it can't be done. You are right – it can't be done. It really is nothing more than a laudable objective. You will not have perfect little cubes. But get them as close as you can, and stir gently to see if there are any big long “worms” of curd that need to be cut up some more. Now set your timer for 15 minutes and walk away. The curds will begin to settle a bit in the pan, and you will see the whey begin to separate out of the curd. When you cut the curds, you are exposing all of those little surfaces to the whey in the pot, and it will draw more whey out of the cubes.
After 15 minutes has passed, turn the burner on under your double boiler. The curds need to be stirred gently while heating so that they don't mat in the bottom of the pan. If you are heating directly on the burner, turn heat on lowest setting. You want to heat the curds to 100º over 25 minutes. You must do this slowly. Patience is required here. Then let the curds sit at 100º for 10 minutes. Now you will slowly raise the temperature to 112º. This should take another 15 minutes. Then let the curds sit at the target temperature for 30 minutes. If the curds still feel very soft at the end of this time, let them cook a little longer at 112º. If you exceed that temperature by more than one or two degrees, you will have tough cheese, so again, be patient and watch the heat. Let time do the cooking, not temperature.
When the curds feel fairly firm, it is time to drain them. Line your colander with sterilized cheesecloth (I steam mine in a vegetable steamer) and gently pour off a bit of the whey that should be floating on top of the curds. Now use a large ladle to ladle the curds into the colander or pour them gently directly from the pot. Let them drain for about five minutes, then gather up the ends of the cheesecloth and tie them into a hobo's bag. Slip a chopstick through the knot and let the bag hang for about 20 minutes inside your pot. (The chopstick should fit on the rim of the pot, holding the bag of curds out of the whey that will be draining from it.)
About the whey – I will tell you right now that the whey from this recipe is not good for ricotta. I don't know why, but don't bother. But there are all sorts of good things to do with whey. Put a little in your oatmeal and let it sit on the counter overnight before cooking for breakfast the next morning. Ditto with pancake batter – make it the night before and put in fridge overnight. Put some whey in homemade mayonnaise and let it sit on counter for seven hours before refrigerating – it will last several weeks instead of just a couple. Drink it. Give it to your dogs – they love it! Chickens love it even more. Water your plants with it. Pour it on your compost pile. Whey is alive and teaming with good things. Do not throw it down the drain!
Okay, by now your cottage cheese has drained enough. Fill a large bowl (or your emptied pot) with ice cold water and swish the bag of curds through the water several times. It will get kind of milky looking. Then let the whey drain again for about 15 minutes. Swish in fresh cold water and drain again for 15 minutes. This is a really important step, because the cheese will last longer if it has been washed well.
Now dump the curds into a large bowl, stir, and salt to taste. If you have used raw milk and if you have washed the curds well, then pour in the reserved cream. Your cottage cheese will stay good for a week or two. If you have used pasteurized milk or have been a bit careless about washing the curds, then save the cream and add to the cheese as you eat it, since the cream will make the cheese spoil a little faster.
Store the cheese, refrigerated, for a week or two, but best if eaten within a week.
Here is one of my favorite ways to eat my homemade cottage cheese. Oh Mama’s Deli at the South Bend Farmers Market sells this great Muffaleti Olive Salad and I mix it about 5:1, cottage cheese to muffaleti. Stir, add some fresh ground black pepper, enjoy!

Bon appétit!
Susan...thank you so much for sharing your cottage cheese making with us...It looks so delicious! We still have a couple weeks left in our Cottage Cheese Adventure....does anybody else want to say anything!?