Wednesday, September 7, 2011

It's time for a well-deserved break for some hard-working forgers.  We hope to come back inspired and revitalized.  Visit us at Living in the Kitchen with Puppies and girlichef to see what we're up to in the meantime.  

"Blessed are the Cheesemakers.~Monty Python

Monday, August 1, 2011

August Forges: Four Weeks of Savoury Delights!

Pic credit - Kotanyi

We are mixing it up this month at FF, doing a weekly spotlight on some savoury delectables. Last month was all about the sugar, this month is about the spice. Are you ready? Let's roll up our sleeves and get savoury!

Week One
Pic credit - Woman's Day

We know, you are hot. Wanna get hotter? Of course you do! The first project is going to incinerate you, but in a good way. Let's heat it up!

Habanero Hot Sauce
Rick Bayless
Makes about 2 cups

5 cloves garlic, unpeeled
1/2 cup peeled, roughly chopped carrot (you'll need 1 medium carrot)
1/2 cup roughly chopped white onion (you'll need about half of a small onion)
12 medium (about 5 ounces) orange habanero chiles, stemmed
1 cup apple cider vinegar
About 2 teaspoons salt
1/4 teaspoon sugar

Directions

Roast the garlic in a skillet over medium heat, turning regularly until soft and blackened in spots, 10 to 15 minutes.  Cool and peel.

In a small saucepan, combine the carrot, onion and habanero chiles with the vinegar and 1 cup water.  Partially cover and simmer over medium-low heat until the carrots are thoroughly tender, about 10 minutes.  Pour into a blender jar, add the roasted garlic, salt and sugar.  Blend until smooth.  Thin with a little additional water if you think your hot sauce is too thick. Taste and season with additional salt if you think necessary.

Pour into jars or bottles and store in the refrigerator until you're ready to add some dazzle to a dish.

*Bonus Challenge for our intrepid forgers - Add some pineapple to that sauce! Smoked, grilled, fresh, juice, or canned - the choice is yours!

Optional Spicy Vinegar! 
Because you want to use up your pineapple rinds, don't you? ☺

Vinagre
Spicy Pineapple Vinegar
yield: ~4 c.

"A bottle of this spicy condiment is found on every table of every fonda in Puerto Rico.  It is, easily, more popular than ketchup."  ~Daisy

2 ripe pineapples
1/2 lg. Spanish onion, thinly sliced
20 cloves garlic, smashed and peeled
6 habañero chiles, stemmed & coarsely chopped
1 Tbs. cider vinegar, plus more as needed
1 Tbs. smashed fresh oregano leaves
1 tsp. black peppercorns
1/2 tsp. kosher or fine sea salt, plus more as needed

Directions

Peel the pineapples and set aside the peel for use.  Save the pineapple for eating or use in something else.  Put rinds in a pot large enough to hold them comfortably, pour in enough cold water to cover and bring to a boil over high heat.  Adjust heat so liquid is at a gentle boil and cook until rinds are very tender, ~30 mins.  If water dips below rinds, top off as necessary to keep them submerged.

Meanwhile, put onion, garlic, chiles, vinegar. oregano, peppercorns, and salt in a large jar (or two smaller) w/ tight fitting lid.  Strain pineapple liquid into large measuring cup or bowl.  Pour into the jar of seasonings. Taste and add a little salt or vinegar if you think it needs it.  Can be used as soon as it cools, but will get better as it sits.  Keep in fridge for up to 2 months.

~~~~~~~~~~~~~~~~~~~~~~~~~~~~~~~~~~~~~~~~~~~~

Week Two
Ready to get a little corny?

Sweet Pepper and Corn Relish
by Karen Soloman author of Can It, Bottle It, Smoke It
Makes about 6 cups (3 pints)
Time commitment about 1 day

I drink the brine on this one. I kid you not. This is a super old-fashioned pickle so self-consciously retro that it’s modern again—ready for its place on your Aunt Bitty’s relish tray alongside the three-bean salad and the pickled beets. Just FYI, I actually prefer frozen corn to fresh here because—well, forgive my shallowness, but frozen corn is just prettier than anything I’ve ever been able to cut off the cob, and the strong flavors in this mix don’t merit the extra effort. (Oh, and thanks to my intern, Sam, who showed me how awesome this is baked with salami on a pizza.) Note that it’s natural for the brine to get cloudy as the corn releases its starch.

1 tablespoon vegetable oil
3¾ cups diced red bell pepper (3 or 4 peppers)
1 tablespoon kosher salt
4 cups fresh or thawed frozen corn kernels
1¾ cups diced red onion (1 very large onion)
1½ cups apple cider vinegar
1½ cups sugar
½ teaspoon ground turmeric

Instructions 
Heat the oil in a large skillet over medium-high heat. Add the peppers and salt and sauté for approximately 12 minutes, stirring often, until the peppers soften and begin to caramelize. Add the corn, stirring to combine, and cook the vegetables for 3 to 4 minutes longer, until the corn is hot. Turn off the heat and add the onion to the pan; stir well.

In a small saucepan over medium heat, combine the vinegar, sugar, and turmeric and stir just until the sugar
dissolves, about 2 minutes.

Pack the vegetables tightly into 3 clean pint jars, and pour the warm brine over the vegetables to cover completely, discarding any unused brine. To can the relish for  longer storage, process the jars according to the instructions below. Otherwise, cover tightly, and let the relish sit at room temperature for 1 day before moving it to the refrigerator.

How to Store It: Refrigerated, this will keep for up to 6 months. Canned, it will keep for up to 1 year.

How to Can It: Place an empty canning pot or stockpot on the stovetop (don’t turn on the heat yet). Place as many jars in the pot as will fit without touching one another (you may have to process the jars in multiple batches). Fill the pot with cold water to cover the jars by at least 1 inch. Put the lid on the pot and turn the heat to high. Bring the water to a boil and let the jars boil for 15 minutes.

Put a kitchen towel on your counter. Turn the heat off and carefully remove the jars from the hot water
bath with tongs or canning tongs and place them on the towel (don’t let the jars touch). You will likely hear some of the jar lids pop, indicating that they have been properly sealed (they can still be properly sealed even if you don’t hear the pop). After the jars have cooled for about 10 minutes, check the seals: press down on the center of each lid; it should not bounce back. If it does, move the jar to the refrigerator once it’s cool and eat within a week.

Excerpted from Can It, Bottle It, Smoke It by Karen Solomon Copyright © 2011 by Karen Solomon. Excerpted by permission of Ten Speed Press, a division of Random House of Canada Limited. All rights reserved. No part of this excerpt may be reproduced or reprinted without permission in writing from the publisher.


And now to get our Bayless on! 
Week Three

Chipotle Steak Sauce 
Makes 1 1/2 cups sauce
Recipe from Season 7 of Mexico - One Plate at a Time
Rick Bayless

Ingredients

1 14-ounce can diced tomatoes in juice (preferably fire-roasted)
3 garlic cloves, peeled and halved
3 canned chipotle chiles en adobo
    OR  8 to 10 dried arbol chiles
1/2  teaspoon dried oregano, preferably Mexican oregano
2 tablespoons cider vinegar
Salt

Directions

In a food processor or blender, combine, the tomatoes, garlic, chiles, oregano and vinegar.  Process until smooth.  Pour into a small (2-quart) saucepan and bring to a simmer over medium heat.  Simmer 15 minutes, remove from the heat and stir in water, if necessary, to give the sauce the consistency of steak sauce.  Taste and season highly with salt, usually 1 1/2 teaspoons.  Cool, pour into a bottle and refrigerate until needed.


Week Four
Slow Roasted Garlic Mojo

Mojo de Ajo
Makes about 3 cups mojo de ajo (made with 2 cups of oil)
Recipe from Season 7  Mexico - One Plate at a Time
Rick Bayless

Ingredients


4 large heads garlic
       OR 10 ounces (about 1 3/4 cups) peeled garlic cloves
2 or 3 cups fruity olive oil
1 teaspoon salt
1/2 cup fresh lime juice

Directions

Heat the oven to 325 degrees.  Break the heads of garlic apart, then mash each clove (a fist against the side of a knife is what I do) to release the clove from its papery skin; if using already-peeled garlic, scoop the cloves into a heavy plastic bag and use a rolling pin to mash them slightly.

Stir together the garlic, oil and salt in an 8x8-inch baking pan (make sure all the garlic is submerged), slide it into the oven and bake until the garlic is soft and lightly brown, about 45 to 55 minutes.

Add the lime juice and return to the oven for 20 minutes for the garlic to absorb the lime and turn golden brown.  (If you’re using the larger quantity of oil, ladle off 1 cup—no garlic cloves—and store it in a cool dry place for use in salad dressing or sautéing.)

Using an old-fashioned potato masher or large fork, mash the garlic into a coarse puree.  Pour the mixture into a wide-mouth storage container and refrigerate it until you’re ready to enjoy some deliciousness. The mojo will last for up to three months as long as the garlic stays submerged under the oil.


Do you have to go in order? Of course not! We are laid back and easy-going forgers. Have fun with it!


1. Natashyas Hot Sauce and Vinegar!

2. Alicias smoked Twilight hot sauce

3. Heathers Hot Sauce


This linky list is now closed.

Saturday, July 2, 2011

July's Forge: Italian Prune and Cardamom Conserve or Brandied Red Cherry!

It's July and we have gotten over the shock of kids being out of school. Fresh fruit abounds and it is time to can some of the bounty up for winter! I know, I said winter. When you are Canadian, it is hard to forget about the cold.

But trust me, you'll thank me in those frosty months when you have some bottled up summer to graze on.

Time to fire up the canner! Choose one or both of the featured canning recipes from The Blue Chair Jam Cookbook to forge this month. Link up your forges to share! 

teaparty Italian Prune & Cardamom Conserve 

Italian Prune & Cardamom Conserve

From The Blue Chair Jam Cookbook by Rachel Saunders

The term conserve typically refers to a jam involving both fresh and dried fruit, often with the addition of liquor, spices, and nuts. These preserves are traditionally served alongside savory dishes or with cheeses, as well as for breakfast. In this delicious fall conserve, Italian prune plums are accentuated by dried currants and a generous splash of plum brandy.

Ingredients:
4 pounds pitted and halved Italian prune plums
1 1/2 pounds white cane sugar
3 ounces strained freshly squeezed lemon juice
2 ounces slivovitz or other dry plum brandy
2 ounces dried currants
1/2 teaspoon white cardamom seeds

Day 1
Place the prune plums, sugar, lemon juice, slivovitz, and currants into a glass or hard plastic storage container. Stir well to combine, cover tightly, and refrigerate for 48 to 72 hours, stirring once each day.

2 to 3 Days Later
Place a saucer with five metal teaspoons in a flat place in your freezer for testing the jam later.

Transfer the plum mixture to an 11- or 12-quart copper preserving pan or wide nonreactive kettle. Place the cardamom seeds into a fine-mesh stainless steel tea infuser with a firm latch and add it to the mixture.

Bring the mixture to a boil over high heat, stirring frequently with a large heatproof rubber spatula. Continue to cook, monitoring the heat closely, until the conserve thickens, 35 to 45 minutes. Skim off any surface foam with a large stainless steel spoon. Scrape the bottom of the pan often with a heatproof rubber spatula, and decrease the heat gradually as more and more moisture cooks out of your conserve. For the final 10 to 15 minutes of cooking, stir the conserve nearly constantly to prevent burning.

To test the conserve for doneness, carefully transfer a small representative half-spoonful of conserve to one of your frozen spoons. Replace the spoon in the freezer for 3 to 4 minutes, then remove and carefully feel the underside of the spoon. It should be neither warm nor cold; if still warm, return it to the freezer for a moment.

Nudge the conserve gently with your finger; if it seems thickened and gloppy when you nudge it, it is either done or nearly done. Tilt the spoon vertically to see how quickly the conserve runs; if it runs very slowly, and if it has thickened to a gloppy consistency, it is done. If it runs very quickly or appears watery, cook it for another few minutes, stirring, and test again as needed.

 When the conserve is ready, remove the tea infuser, then skim any remaining foam and discard. Pour the conserve into sterilized jars and process according to the manufacturer’s instructions or as directed on page 52.

Approximate Yield: five to six 8-ounce jars
Shelf Life: 18 months

or

Brandied Red Cherry Conserve

cherry conserve Brandied Red Cherry Conserve 

From The Blue Chair Jam Cookbook by Rachel Saunders

Even at the very beginning of summer, I keep the cooler months in the back of my mind, always trying to stash away a few wintry jams when the occasion presents itself. Cherries are particularly suited to spice, and this is one preserve I love to make in mid-May, when the first flush of summer cherries arrives. Its flavor is very concentrated, almost like mincemeat’s, and it makes a staggeringly good holiday pie filling. This recipe may be varied any number of ways: Use a different combination of dried and candied fruits, or replace the plum brandy with plain brandy or cognac. But the combination of citron, cloves, and plum brandy is my favorite: Christmas in a jar.


Ingredients:
3 pounds pitted sweet red cherries, divided
1 1/4 pounds white cane sugar, divided
3 ounces strained freshly squeezed lemon juice, divided
2 ounces dried currants
1/2 pound chopped candied citron (see page 91)
2 1/2 ounces slivovitz or other dry plum brandy
3 to 4 drops almond extract
3 cloves

Place a saucer with five metal teaspoons in a flat place in your freezer for testing the jam later.

Combine 1½ pounds cherries with 10 ounces of the sugar and 1½ ounces of the lemon juice in an 11- or 12-quart copper preserving pan or wide nonreactive kettle.

Bring the mixture to a boil over high heat, stirring frequently, and cook until the cherries have softened, about 5 minutes. Turn off the heat and let the cherries rest for 5 minutes. Put them through the fine holes of a food mill, scraping any fruit that will not go through back into the resulting puree.

In a large mixing bowl, combine the cherry puree with the remaining cherries, sugar, and lemon juice, and the currants, citron, brandy, and almond extract, stirring well to combine. Let the mixture macerate at
room temperature for 45 minutes, stirring occasionally.

After 45 minutes, transfer the mixture back to your preserving pan. Put the cloves into a fine-mesh stainless steel tea infuser with a firm latch and add it to the mixture, pressing down on it to be sure it is submerged.
Bring the mixture to a boil over high heat, stirring often.

Boil vigorously, gently scraping the bottom of the pan with your spatula every minute or two to be sure the mixture is not sticking. Continue to cook, monitoring the heat closely, until the conserve acquires a darker, shinier look, about 20 minutes. At this point, remove from the heat, discarding any cherry pits that may have found their way into the mixture, and test the conserve for doneness. While you are testing, use a metal spoon to carefully scrape all the stiff white foam from the top of the mixture and discard.

To test the conserve for doneness, carefully transfer a small representative half-spoonful of conserve to one of your frozen spoons. Replace the spoon in the freezer for 3 to 4 minutes, then remove and carefully feel the underside of the spoon. It should be neither warm nor cold; if still warm, return it to the freezer for a moment.

Tilt the spoon vertically to see how quickly the conserve runs; if it runs slowly, and if it has thickened to a gloppy consistency, it is done. If it appears watery, cook it for another couple of minutes, stirring, and test again as needed. When the conserve is ready, remove the mesh tea infuser. Stir the conserve briefly to evenly distribute the cherries, then pour it into sterilized jars and process according to manufacturer’s instructions or as directed on page 83.

Approximate Yield: six 8-ounce jars
Shelf Life: 8 to 10 months


1-Cherry & Kirsch conserve
2-Natashyas Plum and Cardamom Conserve


This linky list is now closed.

Sunday, May 1, 2011

May's Forges ---> Queso Oaxaca & Chorizo

With a nod to the victory at the Battle of Puebla by Mexico, we are going south of the border this month to forge both Queso Oaxaca and fresh Chorizo.  As always, you are welcome to use any recipe you choose, but we'll provide you with one for each, if you'd like to use it.

We'll be making the fresh version of chorizo this month, which is commonly referred to as Mexican Chorizo.  I make it and store it in bulk, but if you want to stuff it in casings, then go for it.  I do plan on trying this one day so that I can hang it and dry it, but until then..this recipe for chorizo is the one I adapted from Antojitos and use all the time. 
Homemade Chorizo
adapted from Antojitos via girlichef
yield: ~1 1/2 lb.

3 chiles de árbol
7 pasilla chiles
1/2 c. onion, chopped
3 cloves garlic, chopped
1 bay leaf
1/2 c. white vinegar
1 Tbs. kosher salt
2 tsp. cumin, ground
2 tsp. Mexican oregano, dried
1 1/2 tsp. cloves, ground
1 tsp. black pepper, freshly ground
1 lb. ground pork

Layer the chiles, onion, and garlic in a non-reactive bowl or shallow dish.  Add the bay leaf.  Pour in the vinegar and cover the dish tightly with plastic wrap.  Set aside, at room temp, for 1 hour.

Remove and discard the bay leaf.  Transfer the chile-vinegar mixture to a blender and process to form a rough paste.  If it is too thick to move easily through the blender, add ~1 Tbs. of water at a time 'til it moves freely.

In a bowl, mix together the chile paste, salt, cumin, oregano, cloves, & pepper.  Add the pork and mix until the paste and spices are evenly distributed.

Put the raw chorizo in a container with a tight fitting lid and refrigerate for at least 12 hours or up to 5 days.  If keeping longer than 5 days, transfer to freezer bag and freeze for up to 2 months.

*If you want to test for seasoning before letting it age in the fridge, simply cook a little blob in a skillet and taste the cooked product.  Adjust seasoning as necessary.

------------------------------------------

I had a bit of a problem finding an actual recipe for Queso Oaxaca...and can't quite figure out why!?  BUT.  Since Queso Oaxaca is basically mozzarella (like string cheese) rolled long and formed into a "knot" shape, I figured we could go with a mozzarella recipe...adapting it to the classic Oaxacan cheese shape.  I have seen some knots that are tighter and some that looks loose, but once they are chilled, you are able to either slice them or pull stringy cheese chunks from them.  If anybody does know of an actual recipe for Queso Oaxaca, then by all means...do share!!
photo credit: jlastras via flickr
Queso Oaxaca
adapted from (the microwave mozzarella recipe in) The Home Creamery
1 gallon whole or low-fat milk
2 tsp. citric acid powder
1/4 tsp. liquid rennet
1/4 c. cool water (55°-60° F)
Pour the milk into a large, heavy-bottomed pot and add the citric acid, stirring for 2 minutes. Bring the milk to 105° F. (It doesn't matter whether you stir.) Check the temperature with a thermometer. Remove the pot from heat. 

In a small cup, dissolve the rennet in the water. Add this mixture to the milk and stir for 30 seconds. Cover the pot and let stand for 15 minutes.

Using a wide, shallow ladle, scoop the curds carefully into a microwave-safe bowl and pour off and press out the excess liquid.

Microwave on high for 1 minute. Pour off excess liquid, being careful because it will be very hot. Turn curd and microwave on high for 30 seconds longer. Remove cheese from microwave. Drain off excess whey. Repeat process, draining and pressing off excess whey... until no whey is left.

Using a wooden spoon (or your hands...super careful, it's hot), stir and stretch the cheese for about 10 minutes or until it's stringy and shiny. If itcools too much, it will become hard to stretch. If this happens, reheat the cheese for 30 second intervals until it becomes pliable again. 

Pull, stretch, and shape into a knot by wrapping the strings around each other.  Refrigerate.

------------------------------------------

If you find or have any recipes that you already use...or try and like...please feel free to leave links in the comment section.  Now let's forge!


1. Natashyas Chorizo

2. queso oaxaca


This linky list is now closed.

Sunday, April 3, 2011

April's Forging Challenges!

Happy Spring! 
The sun is shining, the birds are chirping, the land is slowly coming back to life.

This month we are forging Lamb Sausage. Perfect for Easter fare or spring grilling season. And with sausage, we need some really zingy accompaniments! Our challenge to you is to make the lamb sausage and the pickled garlic, and we have added in optional sides of tzatziki and radish salad to complement your awesome meal!

Lamb Sausage
adapted from Michael Symon, Live to Eat
Makes about 2 lbs
  • 2 garlic cloves, minced
  • ¼ cup minced shallot
  • ½ Tbsp extra virgin olive oil
  • 1½ lbs lamb shoulder, cubed
  • ½ lb pork fatback, cubed
  • 2 tsps smoked sweet paprika
  • ½ Tbsp cayenne pepper
  • 1 tsp ground cumin
  • 1 tsp ancho chili powder
  • 1 Tbsp kosher salt
  • ½ tsp sugar
Directions:

Sweat garlic and shallots in the olive oil in a medium pan until translucent, about 2 minutes.
Let cool completely.
Combine all the ingredients, the chilled meat and fat with the seasonings, well. Cover and let chill 24 hours.
Grind (twice, if you like) in your meat grinder. If you don't have a meat grinder, pulse in small batches in a food processor, but a meat grinder will give you a better consistency.
Allow to chill half an hour after grinding,  before stirring to combine well.
Make into patties or logs.
Optionally: purchase hog casings and stuff with sausage stuffer.
Keep refrigerated for up to 1 week, or freeze.
Cook until you reach an internal temp of 150°F.


Pickled Garlic
MarthaStewart.com

    * Yield Makes 1 quart

    * 6 heads garlic
    * 4 cups white-wine vinegar (I only needed 2 cups for this recipe)
    * 4 tablespoons sugar
    * 1 teaspoon whole black peppercorns
    * 4 whole cloves
    * 2 small dried chile peppers
    * 1 dried bay leaf
    * Rind of 1 lemon

Directions

   1. Trim garlic heads, leaving stem intact and peeling off all but one layer of papery skin. Set aside.
   2. Combine vinegar, sugar, peppercorns, cloves, peppers, bay leaf, and lemon rind in a medium saucepan. Bring to a boil over high heat; boil 2 minutes more. Add garlic; boil 4 minutes. Remove from heat; cover, and let sit overnight in refrigerator. Garlic may be canned, placed in a sterilized jar, or stored in the refrigerator in an airtight container up to 1 month.

Tzatziki and Radish Salad
Recipe courtesy Michael Symon, CookingChannel.com
Show: Cook Like an Iron Chef  Episode: Secret Ingredient Lamb Chops

TZATZIKI:

    * 1/2 English cucumber
    * 2 cloves garlic, smashed and minced
    * Kosher salt
    * 2 cups Greek yogurt
    * Juice of 1 lemon
    * Freshly ground black pepper
    * 1 small bunch mint, leaves picked and chiffonade (about 1 cup)

RADISH SALAD:

    * 1 shallot, minced
    * Kosher salt
    * 1/2 cup red wine vinegar
    * 8 sprigs fresh oregano, leaves picked and sliced (or more)
    * ½ cup extra-virgin olive oil
    * 2 bunches radishes with greens
    * 1 English cucumber

For the tzatziki:
Grate the cucumber over a wire mesh strainer placed over a bowl. Add the garlic and salt. Set aside to drain for 15 minutes.

To another bowl, combine 2 cups Greek yogurt, juice of 1 lemon, freshly ground black pepper, pinch salt, and mint. Set aside.

Squeeze out the excess moisture of the cucumbers and add to the Greek yogurt mixture. Stir to combine.

For the radish salad:
To another bowl, add the shallot and season with salt. Add the red wine vinegar, oregano, and whisk in about 1/2 cup extra-virgin olive oil. Taste and re-season, if needed.

Remove the greens from the radishes and wash the greens in salted iced water. Place into a salad spinner to dry. Set aside. Thinly slice the radishes and add to the dressing. Halve the cucumber lengthwise. Thinly slice the cucumber into half-moons.

Tear and then add the dry radish greens to the vinaigrette and toss to combine.

Happy Forging!


This linky list is now closed.

Tuesday, March 1, 2011

March's Challenge - Double your Pleasure, Double your Fun!

We are all of us getting a little winter-weary and dreaming of spring. 
And with spring comes re-organization. 
Even here at Forging Fromage!
Yes, we are expanding in our repertoires. 
Not only will we be encouraging each other in our fromage forging, but in other DIY kitchen projects such as growing, preserving, charcuterie, and fermenting as well.
This is our year forgers - we are moving forward!
This year we are witches and goddesses and earth-mamas of our kitchens. 
(And all the necessary masculine equivalents for those gents who want to play along!)

Are you ready? Great!

March's Forging Challenges:
Goat's Milk Faisselle and Spiced Orange Slices

We are making a fresh goat's milk cheese and serving it with our own (water-bath) canned orange slices. Delicious!

Goat's Milk Faisselle

Ingredients:
  • 6 goat's cheese moulds
  • Flat-bottomed baking dish
1 quart goat's milk
Pinch mesophilic culture
2 drops liquid rennet

  1. Sterilize all equipment. In a large ss pot over medium heat, warm milk to 86°F, stirring gently to prevent scorching. Remove from heat. 
  2. Sprinkle culture over surface of milk and let stand for about 5 minutes to rehydrate. Using skimmer and an up-and-down motion, gently draw culture drown into milk without breaking surface of milk. 
  3. Dilute rennet in 1 tbsp col water. Add to milk and, using the same up-and-down motion, draw rennet down into milk until well blended. Cover and let set at room temp in a draft-free location for 12 hours. 
  4. Place moulds in a flat-bottomed baking dish. Using skimmer, gently ladle curd into moulds, taking care not to bread up the curd. The whey will begin draining out of the holes in the moulds right away and will collect in the dish. 
  5. As soon as the curd has drained down below the tops of the moulds, cover the dish and place in the refrigerator. The faisselle is ready to use ans soon as it has drained to your desired texture. The longer it drains, the firmer it will become (because the moulds are sitting in the whey, it will stay fairly moist). Store it in the refrigerator for up to 4 days. To remove, unmould onto a plate. 

Makes 6 cheeses, each 3-4 oz.

Moulds - I am going to use my couer a la creme moulds and line them with cheesecloth.


And to go with it....... A seasonal canning recipe...

Spiced Orange Slices

Ingredients:
4 large oranges
8 cups hot water
1 tsp salt
1 cup granulated sugar
½ cup lightly packed brown sugar
½ cup each: cider vinegar and water
¼ cup corn syrup
8 whole cloves
4 cardamom pods
4 cinnamon sticks, 3 inches long
½ tsp peppercorns
  1. Combine whole unpeeled oranges, 8 cups hot water, and salt in a large saucepan. Bring  to a boil, reduce heat, cover and simmer for 45 minutes or until fruit is tender. Drain oranges, discarding liquid, and cool. 
  2. Cut oranges in half crosswise and then into very thin slices. 
  3. Combine granulated sugar, brown sugar, vinegar, water, corn syrup, cloves, cardamom, cinnamon, and peppercorns in a large saucepan. Stir over high heat until sugars have dissolved. Reduce heat and cook for 10 minutes. Add orange slices, cover, and cook gently for 20 minutes. Remove from heat and let stand for 5 minutes. Remove and discard cardamom and cinnamon. 
  4. Remove hot jars from canner. Remove orange slices from liquid with a slotted spoon; pack into jars. Pour liquid and whole cloves over oranges to within ½ inch or rim (headspace). Process 10 minutes for ½ pint (250ml) jars and 15 minutes for pint (500ml) jars as directed for water bath canning. 
Makes 4 half-pint (250ml) jars.

    New to canning? Get the safety facts down before starting.  
    Information on safe canning here.


    Recipe sources:


    This linky list is now closed.

    Sunday, January 2, 2011

    January's Dairy Challenge - Homemade Sour Cream


    We hope you had an excellent holiday and are ready to get back to forging!

    Don't worry if you are behind on anything, you can always link up past forges when you get around to them.

    We are starting off the year lightly - with Homemade Sour Cream.

    From About.com:
    Make your own homemade sour cream from heavy cream and buttermilk or more sour cream. Plan ahead to give the sour cream 24 hours to thicken up and chill.

    Prep Time: 24 hours
    Cook Time: 5 minutes
    Total Time: 24 hours, 5 minutes

    Ingredients:

        * 1 cup heavy cream
        * 1/4 cup buttermilk

    Preparation:
    Mix heavy cream and buttermilk in a screw-top jar, cover, and let stand at room temperature about 24 hours until very thick.


    You can find alternative Homemade Sour Cream recipes here.

    And, we are still forging Queso Fresco, recipe here, in case the holidays took up all your time!


    This linky list is now closed.

    Wednesday, December 1, 2010

    December '10 LINKY...add your Forges Here!

    We are just going to continue on this month...everybody is very busy with the holidays, so if you have any past or current forges to link up, then please do so here.  Different homemade cheese and dairy is always welcome, as well.  We wish everybody a safe and peaceful holiday season...

    If you happen to make any fun holiday cheese creations (cheese balls, logs, etc.) feel free to link to those this month, as well!
    Here's a bit of inspiration for you from the American Egg Board:
    picture courtesy CCF
    Holiday Cheese Log
    • 3/4 cup finely chopped parsley
    • 1/4 cup chopped roasted pecans
    • 1/4 cup finely chopped red pepper
    • 3 ounces reduced-fat cream cheese, softened
    • 4 ounces blue cheese, crumbled
    • 6 hard-cooked eggs, finely chopped
    • 2 tablespoons finely chopped green onions
    • 1 garlic clove, minced
    • 1 dash red pepper sauce
     In small bowl, combine first 3 ingredients. Set aside. In medium bowl, beat cream cheese and blue cheese until blended. Stir in eggs, onions, garlic, and red pepper sauce until blended. Shape mixture into a 10-inch log. Roll in reserved parsley mixture. Cover and chill at least 2 hours. Serve with crackers.  (makes ~2c.)
    ---------------------------------------------------------------------------
    No forgers this month :(  The holidays got the best of all of us...let's start again in the new year :)

    Thursday, November 4, 2010

    Our November Cheesy Challenge: Queso Fresco

    With the holidays dominating most of our time for the next couple of months, we've decided to keep the cheesin' simple and go with another fresh cheese this month...and we're heading to....
    ...and who better to take us there than my kitchen idol, Mr. Rick Bayless himself?  Yup, his newest book Fiesta at Rick's has a fabulous recipe for Queso Fresco...one of my favorites and staple in our house at all times.  I must admit, though...I haven't made my own in quite some time.  Better get back to it...there's nothing like it!
    *Bayless notes that he likes to use the buttermilk in this recipe as a starter...to let the milk culture for a few hours before moving on to the cheesing process.  The flavor reminds more of the artisanal cheeses that he knows and loves.  Good enough for me! BUT, if you don't have the time...or the buttermilk...then you may skip this step.  And I imagine sacrifice some depth.

    Queso Fresco
    from Fiesta at Rick's by Rick Bayless
    makes ~1 lb.

    1 gallon whole or 2% milk (remember, the richer the milk/flavor, the better the cheese)
    2 c. buttermilk
    1 tsp. Citric Acid (sometimes called sour salt, sometimes found in kosher section of grocery stores)
    OR
    1 c. fresh lime juice
    1 tsp. salt (pure, fine-ground sea salt works best)

    1. Culture the milk.  Pour milk into a very large pot over med-low heat.  Stir in buttermilk.  Bring milks to 75° F, turn off heat, cover pot and let sit for 3 to 4 hours.

    2. Set the curd.  If using citric acid, stir it into ¼ c. cold water, continuing to stir until dissolved.  With lid off pot, turn heat to medium and stir dissolved citric acid or lime juice into milk mixture.  You will immediately see small curds start to form.  Every couple of minutes, stir slowly, gently, & thoroughly over entire bottom of pot until milk reaches 195°F, ~20 minutes.  At this point the curds will be very obvious, floating in the milky-transparent whey.  Remove from heat, let stand five minutes without stirring so all the curd can rise to the top.

    3.  Drain the curd from the whey.  Wet a large piece of cheesecloth and line a large colander with it.  Set colander in sink (or over bowl if saving the whey).  Carefully ladle all of the curd into the colander. Gather the cheesecloth around the curd and gently squeeze to expel a bit more whey.  Unwrap curd onto a plate, break it up, and sprinkle w/ the salt...working it in with a spoon or your fingers.

    4.  Gather the cheese curds into a 1" thick disk, transfer to a plate, cover, and refrigerate until thoroughly chilled.

    ...and can I just add...THEN GO USE IT IN A FABULOUS MEXICAN RECIPE!  Or sprinkle it on tacos, tostadas, enchiladas, gorditas...you name it!  I cannot get enough Queso Fresco!

    As always, if there's a different Queso Fresco recipe you'd like to use, then please do so.  Link up your posts (or any past forges) to this months linky, which you can find through the sidebar, in the top rh corner!  

    Cheese on, Forgers!

    November '10 - link your FORGES here!

    Hello Forgers!

    This month we're forging Queso Fresco!  We also have Colby and Cheddar from the past few months ripening...possibly... 

    Link any of those cheeses, or any PAST forges that you post in November 
    RIGHT HERE!!


    We can't wait to see what you forged this months!


    This linky list is now closed.

    Monday, October 18, 2010

    How to Make a Mesophilic Starter Culture

    Sometimes a cheese recipe will give you the option of using a starter culture, rather than a direct-set starter. Here is how you do it!

    PREPARATION OF MESOPHILIC STARTER CULTURE
    • Sterilize a clean 1 litre mason jar and lid in boiling water for 5 min. Cool, then fill jar with fresh skim milk leaving a ½ inch head space. Secure lid firmly into jar.
    • Place the jar into canning pot and fill with water to the same levels as the milk in the jar.
    • Bring the pot to a rolling boil and hold for 30 mn
    • Remove jar of sterile milk carefully from the canning pot and allow to cool to 20-22 C or 72 F. To check if the milk in the jar is adequately cooled, hold the jar next to your cheek and it should feel tepid or just slightly warm. It takes about 6-8 hrs after removing from hot water bath.
    • Innoculate the sterile milk by adding 3/8 tsp of the freeze dried mesophilic starter culture to the 1 litre mason jar of sterile milk. Sprinkle the culture evenly on the surface of the milk and quickly re-secure the lid. Allow the culture to dissolve for 2 mn and gently agitate the culture into the milk until fully dispersed. To ensure the culture is adequately mixed, look at the bottom of the mason jar to see if there is any yellow granules. If so, continue to rock the jar until they have disappeared, as this represents culture powder that has not dissolved into the milk.
    • Place the jar in a warm place where the temp. is stable at 72 F or 22 C, up as high as 77 F or 25 C. Keep it there for 12-24 hrs until the milk has thickened. The most ideal location is in the cupboard over the refrigerator, the jar wrapped in a hand towel.
    • After 12 hrs from the time of innoculation, check to see if the milk has coagulated or thickened. This usually takes about 16 hrs under favorable conditions but it can be sooner if the temperature is warmer. When the culture has the consistency of a good firm yoghurt you have reach the coagulation point.
    • Chill the culture immediately by placing the jar in the fridge. It will keep as a fresh active culture for 3-4 wks. The fresher your culture the better your cheesemaking results. The culture can be used for cheesmaking right after the coagulation point is reached. 10 grams of mesophilic culture can be made into 10 litres of mother culture. Do not freeze your prepared culture!!!
    • Keep the unused portion of your culture package in the freezer where it will remain active for 3 years.
    • It is not necessary to prepare a culture in order to make cheese. The freeze dried cultures can also be used as a direct set culture at the recommended rate of the recipe. You can prepare cheese by adding the powder into your cheese pot or vat for direct inoculation.
    • The above procedure can be used to prepare mesophilic and aroma cultures only.

    information from Glengarry Cheesemaking Co. 

    Friday, October 1, 2010

    October's Cheesy Challenge - Greek Island Mizithra

    Greek Island Mizithra
    adapted from 200 Easy Homemade Cheese Recipes

    3 quarts whole milk
    1 tbsp pickling (canning) or kosher salt
    ½ tsp liquid rennet

    Sterilize all equipment.
    In a large stainless steel pot, heat milk gently to 90°F, stirring gently to prevent scorching.
    Remove from heat and stir in salt

    Dilute rennet in ¼ cup cool water. Add to milk and, using an up-and-down motion, draw rennet down into milk until well blended. Cover and set aside at room temperature for 30 minutes to an hour, or until a firm curd has formed.

    Using a whisk, gently break up curd, stirring until curd pieces are approximately ½ inch in size. Let stand for 2-3 minutes. Using skimmer, stir gently for 5 minutes.

    Gently pour curd into a cloth-lined colander and let drain for 1 hour. Scrape cheese into center of cloth. Gather the four corners of the cloth together and tie to create a bag. Hang the bag and let drain over a bowl or the sink for another 5 hours at room temperature. Place a colander in a bowl; place bag in the colander and let drain in the refirgerator for another 12 hours. Twist the cloth tighter from time to time to aid draining.

    Remove cheese from cloth and place in a bowl. Store in the refrigerator for up to 2 weeks.


    There you have it! October's cheesy challenge. Here is a link to the book if you wish, you can use the recipe we provided or one of your choosing. There are many variations of Mizithra.


    Link up to the October linky when you have some great cheese to share!

    Want to suggest recipes for Forging Fromage? Just let us know! 
    email us at forgingfromage at live dot com


    How are your colby and cheddar doing? Mine are still hanging out, suffering benign neglect in my beer fridge. The colby should be ready soon!

    Link up your October forges HERE!

    Hey Everybody!! This is the place to link up anything you forge during the month of October! Can't wait to see what everybody comes up with!!


    This linky list is now closed.

    Thursday, September 2, 2010

    Challenge: Ricotta Salata

    Our newest Cheesy Challenge is going to be Ricotta Salata.  Ricotta Salata is a sliceable cheese with a texture similar to Romano, but it is not nearly as complex...as it doesn't get better with age.  It should be eaten within a week or so.  Basically you use the curds you get from making Ricotta (loose, fresh cheese) and press and salt them.

    If you've never made a basic Ricotta, well then...this is your chance to knock out two cheesy challenges at once!  As usual, you are welcome to use any recipe or method you choose...but I'll go ahead and give you one just in case you don't have one that you already like...or are just too lazy to go looking. No shame in that...it's like I'm talking to myself. I'll start with a Ricotta recipe...gotta start with the basics...and then move on to the Ricotta Salata. Lots of people who are already into making cheese make Ricotta with the whey left after making another cheese...great! Use your chosen method for making Ricotta...then skip down the the Ricotta Salata!

    Ricotta Cheese
    from jam it, pickle it, cure it by Karen Solomon
    yield: 1¼ c.

    8 c. whole milk
    1 tsp. citric acid
    ¼ c. water
    2 Tbs. half & half
    1 tsp. kosher salt

    Pour milk into saucepan.  In small bowl, dissolve citric acid in water, then add it to the milk and set over medium heat.  Stir to distribute the acid evenly.  When temperature of milk reaches 190° F (~15-20 mins.), turn off the heat.  Do not stir or disturb the milk and let sit for ~10 mins. to allow curds and whey to separate.

    Gently strain solids from the liquids in a fine mesh sieve.  Don't press or squeeze at all.  Once most of liquid has dripped out, move the curds to a bowl and toss with cream and salt.

    Store, covered, in refrigerator for up to 1 week.
    fresh Ricotta is loose like this photo credit

    NOW that you have fresh Ricotta cheese....let's turn it into Ricotta Salata!

    Ricotta Salata
    from jam it, pickle it, cure it by Karen Solomon
    yield: 1 (6-8 oz) cheese

    1 1/4 c. Ricotta Cheese Curds
    4 tsp. kosher salt, or more if needed

    Pour the cheese curds into a cheese press and press at room temperature for 3-4 hours, until solid.  Once the cheese has come together, gently coat the exterior w/ 2 tsp.of the salt (or more), then wrap in a clean kitchen towel.  Place wraped cheese on a plate, and refrigerate for 2 days.

    Remove cheese from fridge, rub with 1 more tsp. salt and replace cloth with a clean cloth.  Let sit another 2 days.  Repeat once more; cheese should be quite firm.

    Once it's ready to eat, brush off as much of the salt as possible, and slice from center out-as you would a pie. Enjoy immediately.
    Ricotta Salata photo credit
    *Okay Forgers...Cheese on!  
    Link up to the current month's linky post (which can always be found via link on sidebar) once you've made it and posted on your blog!

    Wednesday, September 1, 2010

    September 1st Round-Up! What we Forged in the August Heat..

    Yeah, it has been hot! But that does not stop our intrepid Forgers - just look at what everyone made this month - great forging!

    August

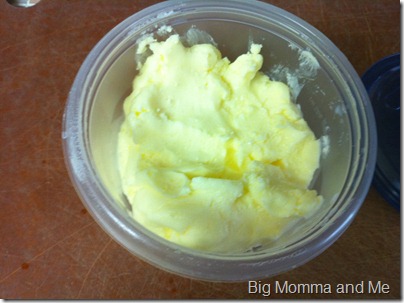
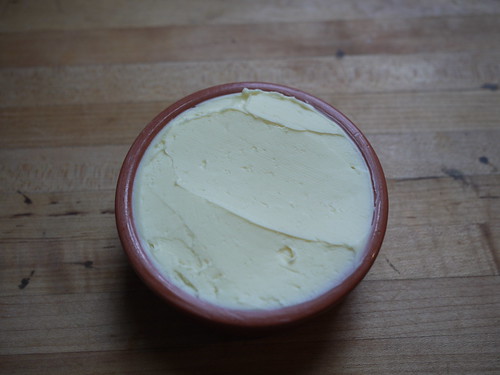
    Ap269 made some glorious cultured butter and fell madly in love with fresh buttermilk.

    And she also made some homemade cottage cheese with Tuscan herbs, yum!

    And, on a roll, Ap269 also made some delicate Brousse - and check out the delicious potato cakes on her post!

    Poppyseed took a break from her peach-fest to make creamy yogurt cheese. Beautiful!

    My partner in crime, Heather, made three delicious variations of the cultured butter.

    Elizabeth made yogurt cheese to go with her delicious grape pie and it is making me very hungry.

    Try, try, again - Ree made some gorgeous feta!

    Lexi made garlic bread with her homemade cultured butter!

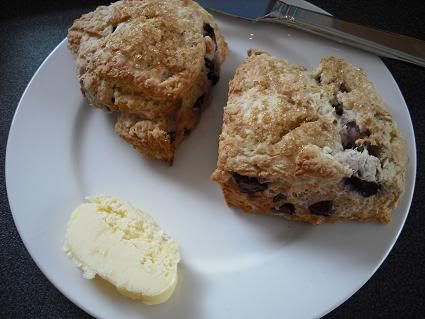
    Foodycat delighted us with fresh cultured butter on homemade cherry and buttermilk scones.

    I (Natashya) loved the whole cultured butter making experience!

    Rebecca made homemade cultured butter, and came up with inventive ways to agitate the cream!

    Veena made some delicious oregano cultured butter for her daughter.

    Thanks, everyone, for forging with us, can't wait for September's challenge!


    *A note*

    It occurs to us Forging Fromage Folk that now that we have the super-handy-way-cool-linky-with-photo .. that the monthly round-up is a little redundant. Let's let the linky do the work for us, so we can spend more time drinking eating forging!

    forgingfromagebutton2